Crochet Easter Egg Pattern
Are you looking for a fresh new crochet project for spring? Maybe you came here looking for a free crochet Easter egg pattern? If so, you’ll love the pattern for these eggs.
The brightness of spring is so welcome after our cold, dark winters. Spring colors are so cheerful, especially around the Easter holiday. I designed this beginner-friendly egg pattern so you can bring more color into your home this time of year.
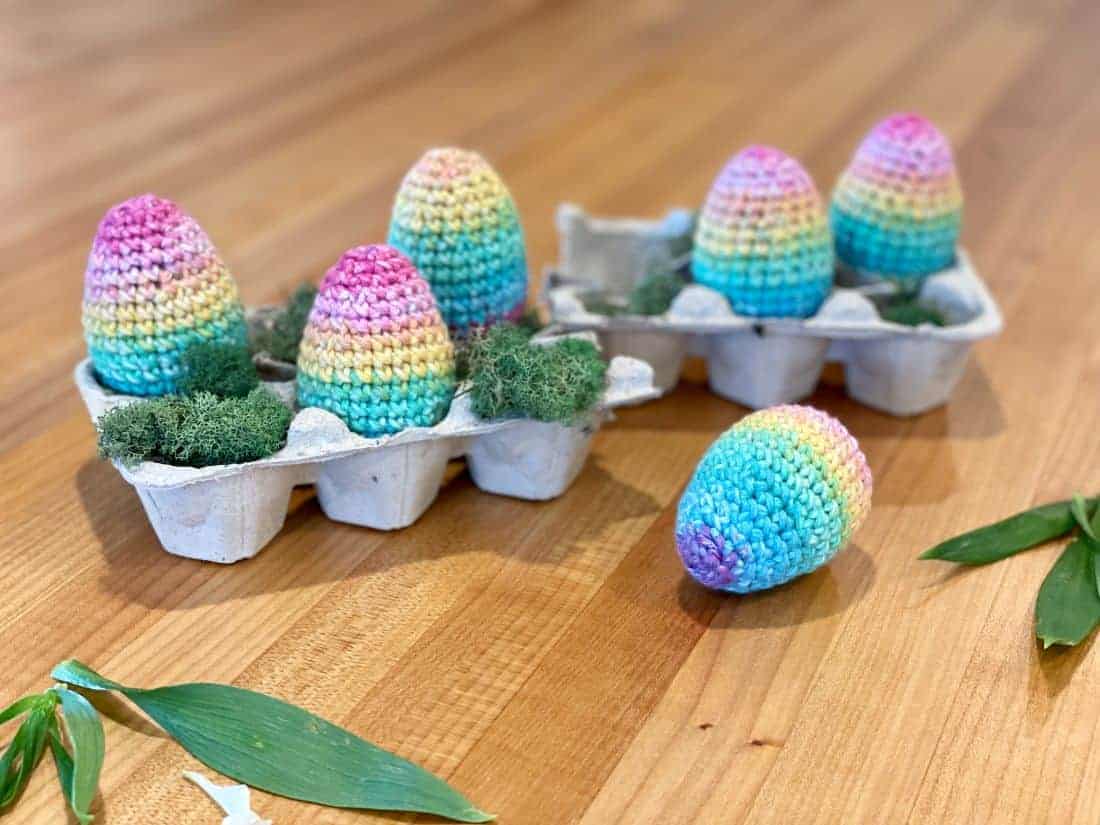
I love the way striped Easter eggs look, but I wasn’t in the mood to do a lot of color changes for this pattern, so I decided to use some self-striping yarn from Hobby Lobby’s I Love This Cotton line. This yarn blends color changes smoothly and gives each egg a slightly different result. The variety makes the eggs look extra cute all together in a basket.
This post contains affiliate links to products I recommend to my readers. If you click on one of these links and decide you’d like to make a purchase, I will make a small commission (at no extra cost to you).

Free Crochet Easter Egg Pattern
Materials Used:
- Yarn – I Love This Cotton in Brights (340)
Also pictured – Paintbox Cotton Aran in Daffodil Yellow (622), Blush Pink (654), Marine Blue (634), and Slate Green (627) - Size F/3.75mm crochet hook
- Stitch Marker
- Yarn needle
- Stuffing
Stitches/Abbreviations Used:
- magic ring
- R – round
- St/sts – stitch/stitches
- sc – single crochet
- inc – increase (work 2 single crochet stitches into the next stitch)
- sc2tog – single crochet 2 together
- invdec – invisible decrease (an alternative to the sc2tog stitch)
Finished Size:
The Easter eggs pictured measure 2 1/2″ by 2″. My tension is on the tighter side; your eggs’ size will vary based on your own tension while crocheting. The yarn and hook size you use will affect your outcome as well.
Pattern Notes:
If you can single crochet, increase, and decrease, you can make these easy Easter eggs! (And if you don’t know these stitches yet, head to my Stitch Tutorials for some pointers).
The eggs are crocheted in the round. They are worked from the bottom up, starting with a wider base and becoming narrower at the top.
Like I mentioned before, I used a self-striping yarn for my eggs (and let me tell you, it is bright)! It gives a beautiful result that reminds me of brightly dyed Easter eggs.
You may, of course, decide to create your own striped palette with color changes for each row or two, which would look great too. Or try making solid eggs in your favorite pastel colors.
Pattern:
R1: Sc 6 into a magic ring. (6)
R2: Inc in each st around. (12)
R3: (Sc, inc) 6x around. (18)
R4: (2 sc, inc) 6x around. (24)
R5-R10: Sc in each st around.
R11: (6 sc, invdec) 3x around. (21)
Begin stuffing as you go.
R12: (5 sc, invdec) 3x around. (18)
R13: Sc in each st around.
R14: (4 sc, invdec) 3x around. (15)
R15: (3 sc, invdec) 3x around. (12)
R16: Sc in each st around.
R17: Sc2tog 6x around. (6)
Fasten off, leaving yarn tail. Use yarn needle to weave yarn tail through front loops of final six stitches. Pull to tighten, then weave in end and trim.
As you can see from the photos, I crocheted quite a few Easter eggs with this pattern! I loved the striped look but also wanted some solid pastels.
If you want to do more crocheting for Easter, check out all of these patterns too.
These eggs use so little yarn that they are perfect for scraps leftover from former projects. What color eggs will you make? Let me know in the comments!
No time to crochet your Easter eggs right now? Save this post on Pinterest for later!
© 2026 Crochet to Play
All rights reserved. Designed and written by Jennifer Percival. This pattern is property of Crochet to Play. The written pattern and images are for personal use only. Please do not redistribute, transfer, or sell the pattern or images, in part or in whole. Thank you.
Using a 3.5mm hook and stuffing firmly, my finished dimensions were 3″ x 1.5″. Really easy to follow the pattern. I started with a Woobles kit at Christmas and now I’m deep in the crochet hole and trying almost every pattern I can find. This pattern is actually my first time with the sc2tog stitch, so thanks for the opportunity to learn.
What is an invdec? I’m an avid crocheter, and never heard of it.
Invdec stands for invisible decrease and it’s an alternative to the single crochet decrease stitch. It’s great for amigurumi and 3D shapes because it leaves fewer gaps. I’ve got a post about it here. Hope that helps!
Do you do video tutorials at all? I am terrible at reading patterns! These are soooooo cute ☺️
Thank you! I don’t have video tutorials at this time, sorry!
what is a magic ring
It’s a technique where you start with a closable ring and work the first round of stitches into it. Lots of great tutorials on YouTube about it!