How to Invisible Decrease
You’ve learned about traditional decrease stitches in crochet, but have you heard of the invisible decrease? This stitch is a must-know technique for anyone interested in making amigurumi and leveling up their work. You’re going to love it!
Traditional single crochet decreases, or sc2tog stitches, are ideal when making something that results in a flat fabric – like a scarf, blanket, or garment. But when you’re making something in the round, especially something stuffed like amigurumi, invisible decreases are a better technique. Why? Because this special decrease helps eliminate gaps.
With traditional decreases, these gaps are often left behind where the decrease was completed. This becomes more obvious if stuffing is added to the work. The invisible decrease helps reduce these gaps and gives a smoother, cleaner finish.
This post contains affiliate links to products I recommend to my readers. If you click on one of these links and decide you’d like to make a purchase, I will make a small commission (at no extra cost to you).
Ready to try it for yourself? Whenever you’re learning a new stitch, I recommend using worsted weight yarn in a light color and a larger hook, such as size I/5.50mm. Using light yarn and a bigger hook can help you to see what you’re doing more clearly and help you notice if you’ve made any mistakes along the way.
How to Invisible Decrease
Step 1: Begin with a Row or Round of Single Crochet Stitches
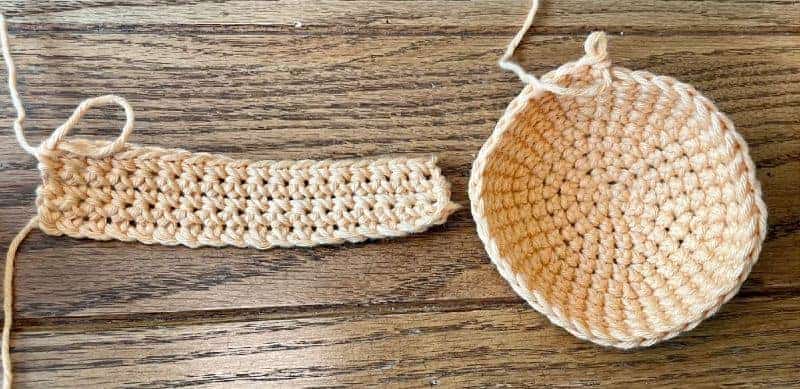
You can practice the invisible decrease (abbreviated “invdec”) in flat rows or in the round. The photos below will show the technique both ways, although it is most common to use this stitch in the round.
Step 2: Learn the Invisible Decrease Stitch
Remember, decrease stitches essentially combine two stitches from the previous row/round into one. In this way, invisible decreases are just like traditional ones.
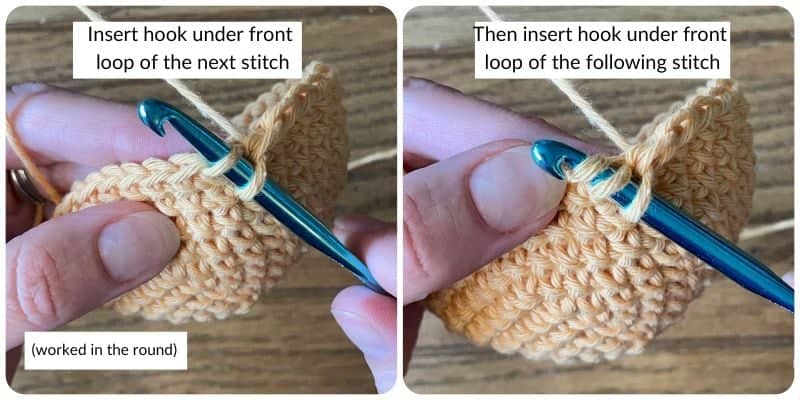
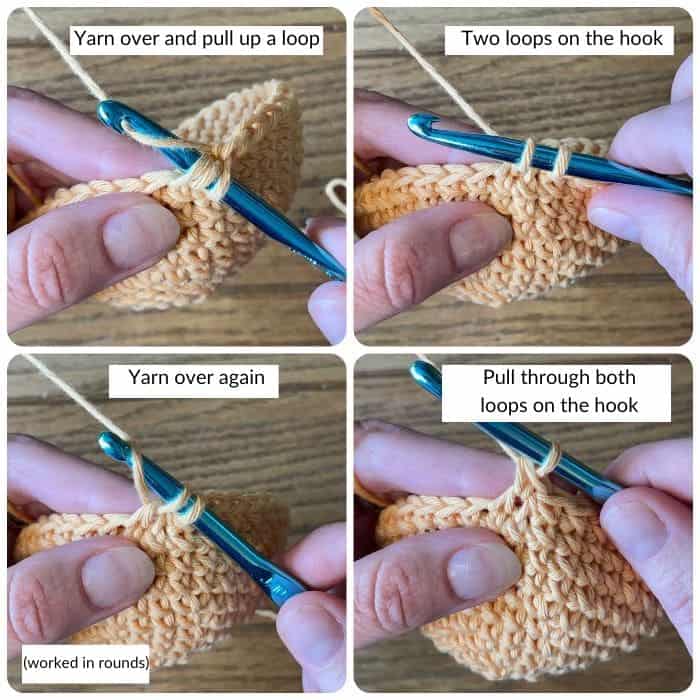
To make your first invisible decrease, insert your hook into the front loop of the next stitch and the front loop of the following stitch. Your hook will be inserted into two front loops at the same time. This photo shows this when working in rows.

And this photo shows this when working in the round.
Yarn over and pull up a loop (pulling back out through both front loops). Then yarn over, and pull through both loops on your hook. You have just completed one invisible decrease stitch! Here it is when working in rows.
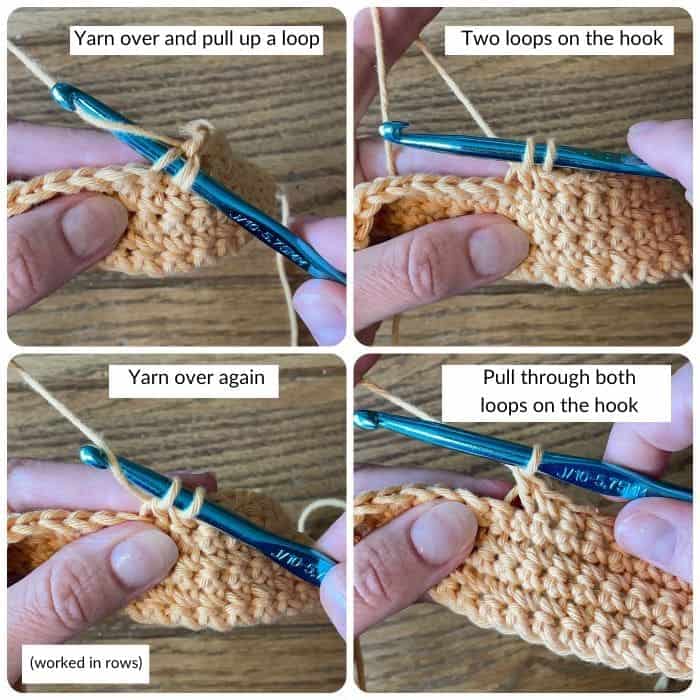
And here it is when working in the round.
Step 3: Keep Practicing
When I first learned to invdec, I know I found it a little awkward to insert my hook into two consecutive front loops at once. This can take some practice to feel smooth, but the result is SO worth it! As you continue to practice and perfect this skill, you will really notice the difference in the neatness of your amigurumi.
If you’d like to watch a video of this stitch, try this one by Bella Coco Crochet. You can also learn about more stitches and crochet techniques by visiting these Stitch Tutorials and Resources as well. Happy stitching!
Keep this tutorial handy on Pinterest by saving here!
© 2023 Crochet to Play
All rights reserved. This blog is property of Crochet to Play. The writing and images are for personal use only. Please do not redistribute, transfer, or sell the writing or images, in part or in whole. Thank you.
Thank you very much for this helpful post! I’ve crocheted for years, but most of my patterns are from before amigurumi and similar things were really popular. I’m finding lots of new terms I need to learn!