
Crocheting a Perfect Circle: a Step by Step Guide
I’ve been crocheting for a while now, but it wasn’t until the past few years that I learned about crocheting a perfect circle. Have you heard of this technique? It is so helpful whenever you’re crocheting in the round, whether you’re making something 2D and flat or something 3D like amigurumi.
You may come across crochet patterns that have you work in a circle when making coasters, rugs, stuffed toys, and baskets with a round base.
For example, this pumpkin pie pattern uses circles for the top and the base. Knowing how to crochet in a perfect circle will make your finished result that much better.
So how do you crochet a perfect circle? Keep reading for everything you need to know.
This post contains affiliate links to products I recommend to my readers. If you click on one of these links and decide you’d like to make a purchase, I will make a small commission (at no extra cost to you).
The Basics
Working in Spiral Rounds
Crochet circles are made by using a series of increase stitches to make your work curve into a spiral that becomes a circle. Instead of working in rows, you work in rounds.
You may be used to joining these crochet rounds by working a slip stitch and then chaining one before starting the next round. Unfortunately, this creates a seam in your circle.
To avoid this seam, you have to crochet in continuous rounds. This means that instead of joining rounds, you work directly into the first stitch of the previous round when beginning the next round. Using a stitch marker will help you keep your place.
If you don’t already begin your circles with the magic ring, you’ll want to start, especially when trying the perfect circle technique. This video by Lauren of A Menagerie of Stitches can teach you about the magic ring.
The Math of Circles
I won’t make you go back to your school days of learning about pi and the diameter of circles, but it’s good to know that all crochet relies on math. To achieve a specific, predictable result, crocheters must use mathematical patterns. This especially applies when crocheting shapes, both 2D and 3D.
Crochet circles are created by working increases (two stitches instead of one) at regular intervals. Circles worked in single crochet most often use multiples of 6 or 8, while circles worked in half double crochet or double crochet use larger multiples of 10 or 12.
But…There’s a Problem
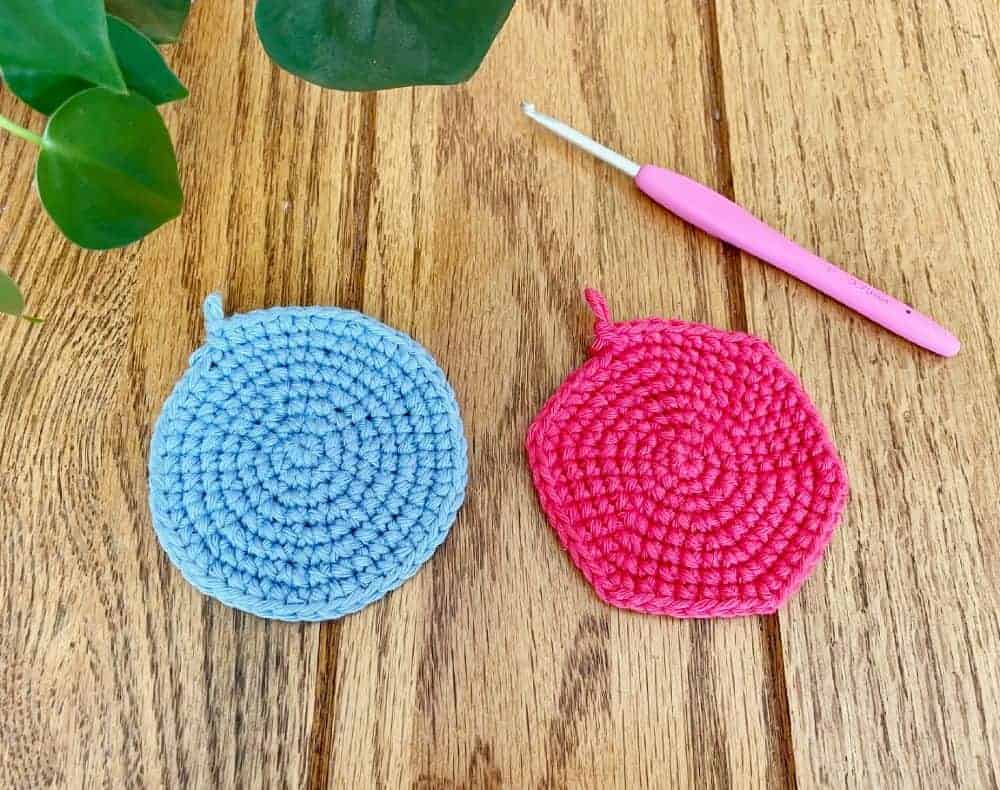
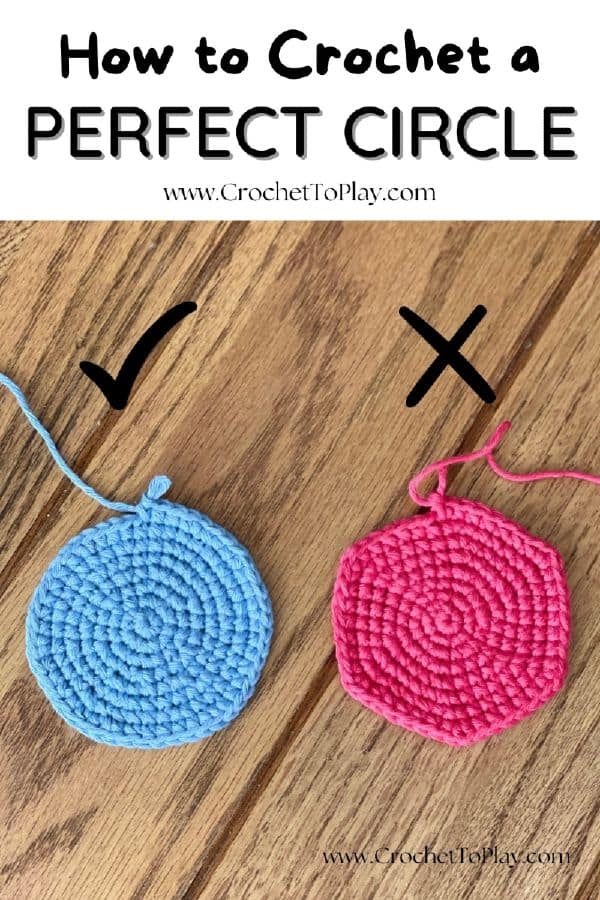
The issue with adding these increases in even, mathematical intervals is that the increases are all lined up. Why is this a problem? When the increases are stacked on top of each other round after round, little points begin to form.
So instead of crocheting a perfect circle, you may find you’ve crocheted more of a hexagon (or octagon, etc.). This becomes more pronounced as your circle grows.
This is even more exaggerated when you’re working tight single crochet stitches, like I so often do when making amigurumi.
The Solution
The solution to dealing with this shaping problem is to learn how to stagger your increases as you crochet each round of your circle.
Most crochet patterns are written with the increases either at the beginning or the end of a set of stitches. This leads to the flat sides and points.
You can fix this, however, by adjusting where you put your increases – alternating between the beginning and the middle of the stitch sets.
Let me show you what I mean. The table below shows a traditionally written crochet pattern on the left, with increases added at the end of every stitch set. On the right, you’ll see the perfect circle method.
You’ll notice the two methods are the same until round 4, when the increases start to move around for the perfect circle. Each increase is highlighted to help you see the pattern.
| Traditional Method: | Perfect Circle Method: |
| Rnd 1: 6 sc into a magic ring. (6) | Rnd 1: 6 sc into a magic ring. (6) |
| Rnd 2: Inc in each st around. (12) | Rnd 2: Inc in each st around. (12) |
| Rnd 3: (Sc, inc) 6x around. (18) | Rnd 3: (Sc, inc) 6x around. (18) |
| Rnd 4: (2 sc, inc) 6x around. (24) | Rnd 4: (Sc, inc, sc) 6x around. (24) |
| Rnd 5: (3 sc, inc) 6x around. (30) | Rnd 5: (Inc, 3 sc) 6x around. (30) |
| Rnd 6: (4 sc, inc) 6x around. (36) | Rnd 6: (2 sc, inc, 2 sc) 6x around. (36) |
| Rnd 7: (5 sc, inc) 6x around. (42) | Rnd 7: (Inc, 5 sc) 6x around. (42) |
| Rnd 8: (6 sc, inc) 6x around. (48) | Rnd 8: (3 sc, inc, 3 sc) 6x around. (48) |
You can use this idea of staggering your increases for any size circle and for any set of multiples. Think of it like a formula, or a pattern, where you alternate where you put your increases.
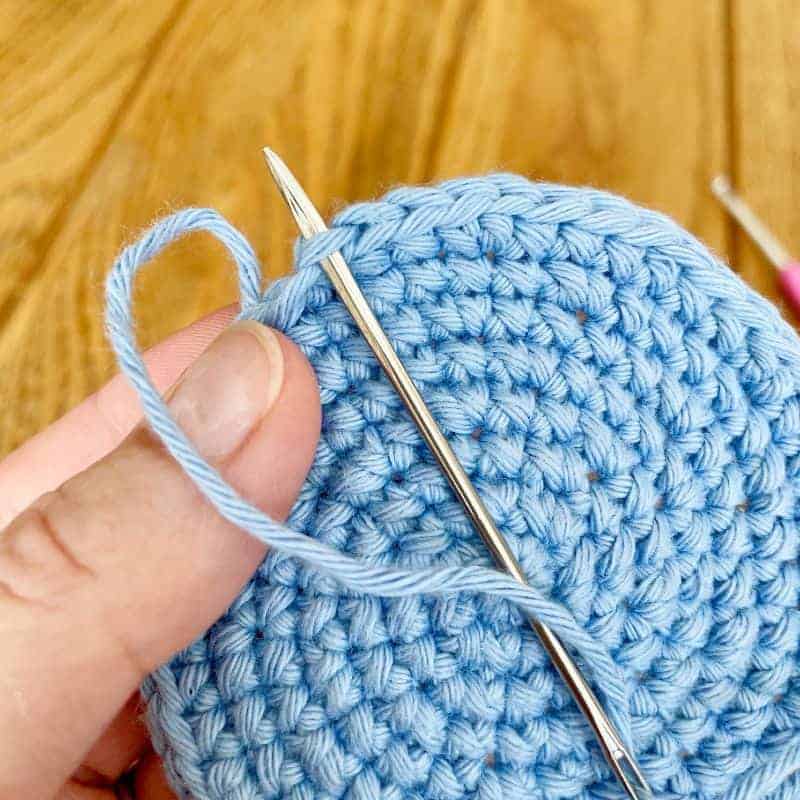
The Invisible Finish
Once you’ve got this down, I’ve got one more tip for you to try. It’s called the crochet invisible finish. Have you heard of it?
When you’re finished with your circle and ready to fasten off, most tutorials will have you slip stitch into the next stitch, then pull through and cut the yarn. This method can leave a little “bump” where you fasten off.
The invisible finish uses your yarn tail to create a faux stitch, evening out the final look. To try it, follow these steps:
Step 1
After completing the last stitch of your last round, do not slip stitch. Pull yarn a few inches through the last stitch and cut the yarn. Thread it onto your yarn needle.

Step 2
Skip the next stitch. Then insert your yarn needle from front to back into the following stitch (threading the yarn needle under both the front and back loops of this stitch).

Step 3
Bring your yarn needle up and insert it between the front and back loops of the last stitch of the final round. Pull the yarn through from front to back until it resembles a stitch (don’t pull too tightly but don’t leave it too loose either).
Step 4
Pull yarn through and cut, weaving in end.

I hope you enjoyed learning about crocheting a perfect circle and the invisible finish. Want to keep learning new techniques? Try these free resources!
Save this post on Pinterest for when you need it!
© 2026 Crochet to Play
All rights reserved. Designed and written by Jennifer Percival. This pattern is property of Crochet to Play. The written pattern and images are for personal use only. Please do not redistribute, transfer, or sell the pattern or images, in part or in whole. Thank you.
This is super helpful!! If I used this to crochet a cylindrical pillow (using the circle as an end and keeping the same amount of stitches as the last circle row for the length) how would I decrease it for the 2nd end?
I would decrease it in the same intervals used to make the initial circle, just in reverse. Hope that helps!
Jennifer, I love your formula for a perfect circle. Thanks for sharing it with us.
My question is, how to you space the increases for rows beyond row 8?
Hi Diana, glad this method was helpful! To continue past eight rounds, follow the pattern of alternating your increases – putting an inc at the beginning of a repeat, then putting the next inc in the middle of the repeat. Continue that for the entire round.