
Crochet Pumpkin Pie
This crochet pumpkin pie might not be as tasty as the real thing, but it’s as cute as can be! And since Thanksgiving will be here before we know it, what better way to get ready than to make some mini pies?
Thanksgiving is a big day in our home, and one of my very favorite holidays. I love having an entire day devoted to slowing down, enjoying a big meal with family, and spending time together repeating sweet traditions. And of course, no Thanksgiving is complete without pumpkin pie!
The crochet pumpkin pie in the pattern below is small, so it works up really quickly. You could easily make a few to give to your Thanksgiving guests as party favors, incorporate them into your place settings, or even give to younger kids to use in a play kitchen.
Ready to make your own? Let’s get started!
This post contains affiliate links to products I recommend to my readers. If you click on one of these links and decide you’d like to make a purchase, I will make a small commission (at no extra cost to you).

You can find an ad-free, printer-friendly version of this pattern on Ravelry or Etsy. The premium version of the pattern includes photo illustrations for each step.
Crochet Pumpkin Pie Pattern
Materials Used:
- Yarn – Yarn Bee Yarn ID in Red Brick and Cafe Au Lait and I Love This Yarn in Ivory (available at Hobby Lobby)
- Size F/3.75mm crochet hook
- Stitch marker
- Stuffing
- Plastic canvas (for base of pie)
- Scissors (for trimming ends)
- Yarn needle (for weaving in ends)
Stitches/Abbreviations Used:
- magic ring
- ch – chain
- R – round or row
- st/sts – stitch/stitches
- sc – single crochet
- hdc – half double crochet
- inc – increase (work 2 single crochet stitches into the next stitch)
- sl st- slip stitch
- BLO – back loops only
Finished size:
My pumpkin pie measures about 4″ in diameter x 3″ tall, using a size F/3.75mm hook and worsted weight (4) yarn. Yours may vary in size based on the yarn you use and your personal tension while crocheting.
Pattern Notes:
Most of this pattern is worked in spiral rounds. Use a stitch marker to keep your place.
The crochet pumpkin pie pictured in this post was made with worsted weight (4) yarn. You could easily substitute another worsted weight yarn for a similar result. If you’d like a more plush look, you could try a bulky yarn like chenille. If you go this route, you’ll want to size up your hook quite a bit.
You’ll see something called “plastic canvas” referenced in the materials list and and in the pattern. This mesh screen can be cut to fit inside your pie. I find this helpful for any amigurumi where you’ll be stuffing it but don’t want the base to be rounded by the stuffing. You could also insert a piece of cardboard cut to size and add some poly pellets for weight.
You may want to try the “perfect circle” technique when crocheting both the pumpkin top and the pie crust base. Making increase stitches in regular intervals can give a more hexagon than circle shape, so try this tutorial to adjust for a more circular shape.
Crochet Pumpkin Pie Pattern:
Pie Top/Filling
R1: Using dark orange, 6 sc into a magic ring. (6)
R2: Inc in each st around. (12)
R3: (Sc, inc) 6x around. (18)
R4: (2 sc, inc) 6x around. (24)
R5: (3 sc, inc) 6x around. (30)
R6: (4 sc, inc) 6x around. (36)
R7: (5 sc, inc) 6x around. (42)
R8: Sc in each st around.
You can fasten off by traditionally slip stitching into the next stitch.
Alternatively, you can fasten off by pulling a few inches of yarn through last stitch, then cutting the yarn. Skipping one stitch, use your yarn needle to insert the yarn tail into the next stitch from front to back. Then bring the needle up and insert between the front and back loops of final stitch of Round 8. This “perfect circle finish” technique is detailed in this blog post.
Weave in yarn end under a few stitches to secure. Set pumpkin pie top aside for now.
Pie Crust
R1: Using tan, 6 sc into a magic ring. (6)
R2: Inc in each st around. (12)
R3: (Sc, inc) 6x around. (18)
R4: (2 sc, inc) 6x around. (24)
R5: (3 sc, inc) 6x around. (30)
R6: (4 sc, inc) 6x around. (36)
R7: (5 sc, inc) 6x around. (42)
R8: In BLO, sc in each st around.
R9-R11: Sc in each st around. Do not fasten off.
Cut a circle of plastic canvas to fit inside the bottom of the pie crust. This step isn’t essential, but the mesh screen keeps the base of the pie flat even after the stuffing is added. You could also use cardboard.
Next, add a little bit of stuffing, saving some to tuck in as the pie top is added.
Putting it all together & finishing the crust
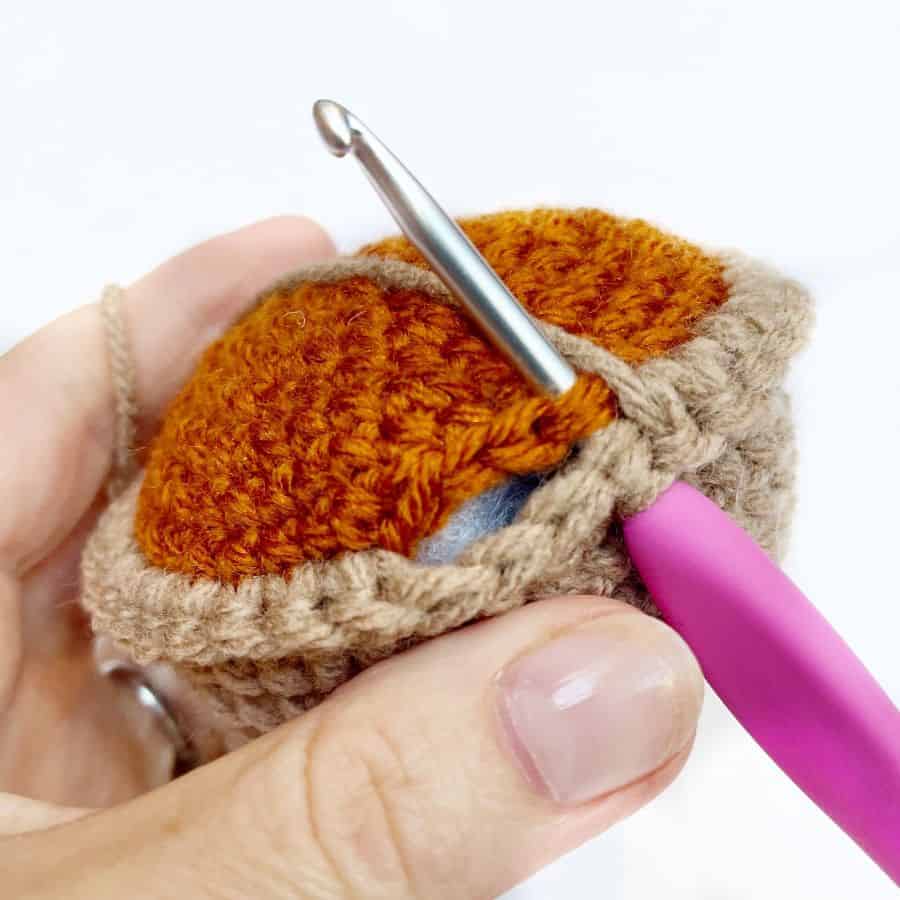
R1: Place the pie top on top of the open pie crust. Using the last loop from Round 10 of the crust, single crochet through the last rounds of both layers all around, tucking in stuffing as you go. (42)
R2: (Sc, hdc, sc in next stitch. Sl st in next st) 21x around.
Fasten off, weaving in end.
Whipped Cream
R1: Using cream, ch 16. Work 2 hdc in 2nd ch from hook and in each st across. (30)
Fasten off, leaving long tail.
You’ll probably find that your yarn is curling into a coil shape already. Wind this coil so that it looks how you want it (I wrapped mine in three spiral layers to look liked swirled whipped cream). Then use one yarn tail and your yarn needle to sew through the layers of the coil so that it keeps it shape.
Place the whipped cream on top of the crochet pumpkin pie. Then use the remaining yarn tail and your yarn needle to sew it securely to the middle of the pie.
Weave in all remaining ends and trim.
And that does it! I hope you love your crochet pumpkin pie. This pattern is simple and works up so quickly, you could make one for each of your Thanksgiving guests.
Love free patterns? You can find lots more right here.
No time to crochet today? Save this on Pinterest for later!

© 2026 Crochet to Play
All rights reserved. Designed and written by Jennifer Percival. This pattern is property of Crochet to Play. The written pattern and images are for personal use only. Please do not redistribute, transfer, or sell the pattern or images, in part or in whole. Thank you.