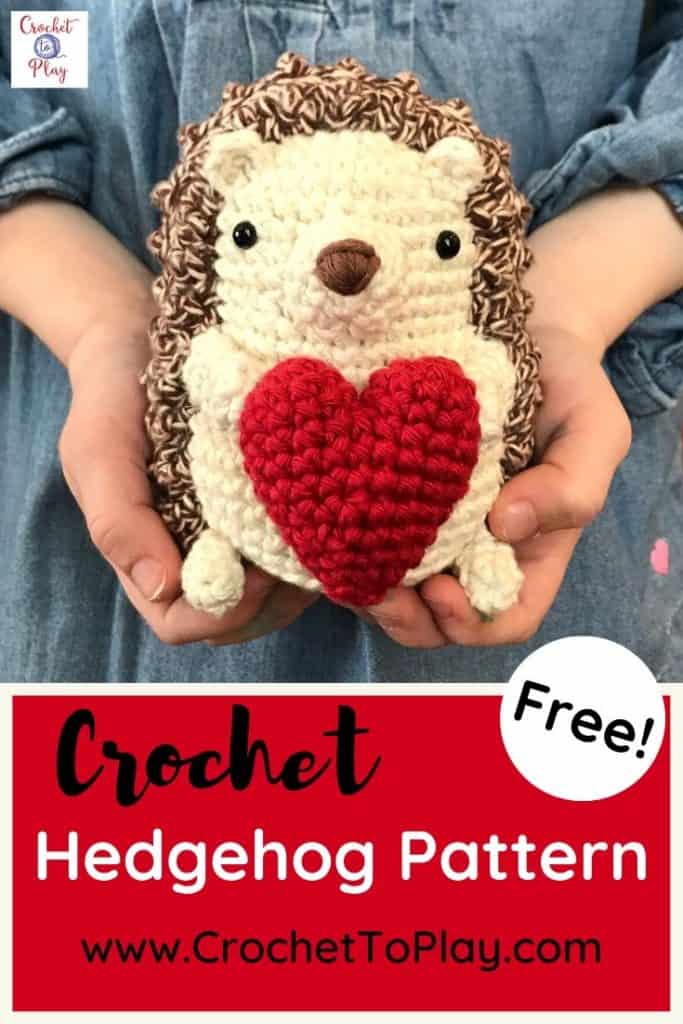
Crochet Hedgehog Pattern
This post contains affiliate links to products I recommend to my readers. If you click on one of these links and decide you’d like to make a purchase, I will make a small commission (at no extra cost to you).
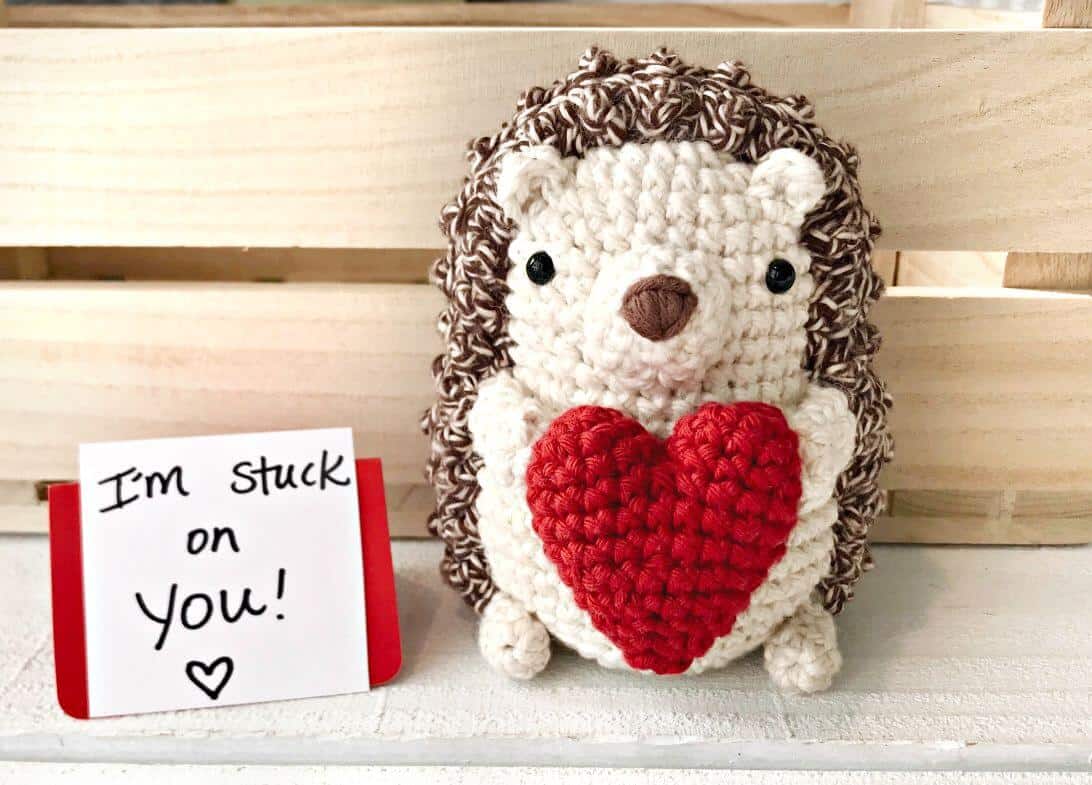
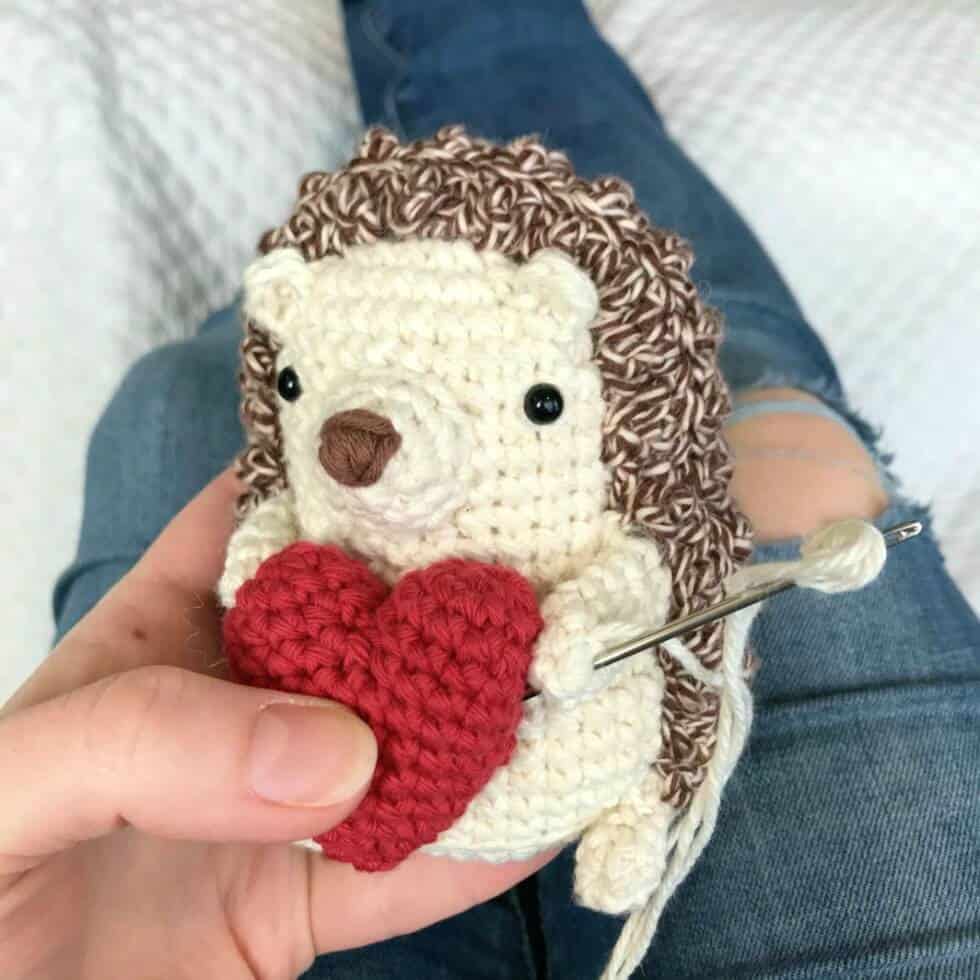
I don’t know what it is about hedgehogs, but I’ve always thought they were as cute as it gets. Even though I know they’re prickly and covered in spines, I think if I ever saw one I’d want to hold it and give it a squeeze! But since I don’t have a real hedgehog, working up this crochet hedgehog pattern was the next best thing. Bonus: totally soft and squeezable.
This is not the first crochet hedgehog pattern I’ve written (see here), but it’s quickly become my favorite. This roly poly guy is small and round and pretty adorable. With Valentine’s Day around the corner, I thought he should be holding a great big heart. If you’re feeling extra clever, gift him to someone with a card that says, “I’m stuck on you, Valentine”!
The directions for crocheting the hedgehog are written below, along with a link to the directions for my amigurumi heart pattern.
You can find a printer-friendly PDF version of this pattern on Ravelry or Etsy. The premium version of the pattern includes detailed, full-color photo illustrations for each step.
No time for the hedgehog today? Pin it for later!
Crochet Hedgehog Pattern
Materials Used:
- Yarn – Paintbox Cotton Aran in Banana Cream, Red Wine, and Coffee (less than 1 50g ball each), and I Love This Cotton in Monkey Brown (less than 1 85g ball)
- Size US E/3.5mm crochet hook
- Yarn needle
- Stuffing
- 1 stitch marker
- 2 safety eyes, 6mm
- Straight pins
Stitches/Abbreviations Used:
- magic ring
- ch- chain
- sl st – slip stitch
- sc – single crochet
- tr – triple crochet
- sc2tog – single crochet 2 together
- invdec – invisible decrease (an alternative to the sc2tog stitch)
Finished Size:
The hedgehog measures about 4.75” from top to bottom.
Ears (make 2):
R1: Using cream, 4 sc into a magic ring. (4)
Sl st in first sc. Fasten off, leaving long tail for attaching. Set aside.
Snout:
R1: Using cream, 6 sc into a magic ring. (6)
R2: (Sc, 2 sc) 3x around. (9)
R3: (Sc in next 2 sts, 2 sc) 3x around. (12)
Fasten off, leaving long tail. Stitch a nose using dark brown yarn, starting in the center of the magic ring from round 1. Use yarn needle to embroider a triangle shape, filling in completely. Set aside.
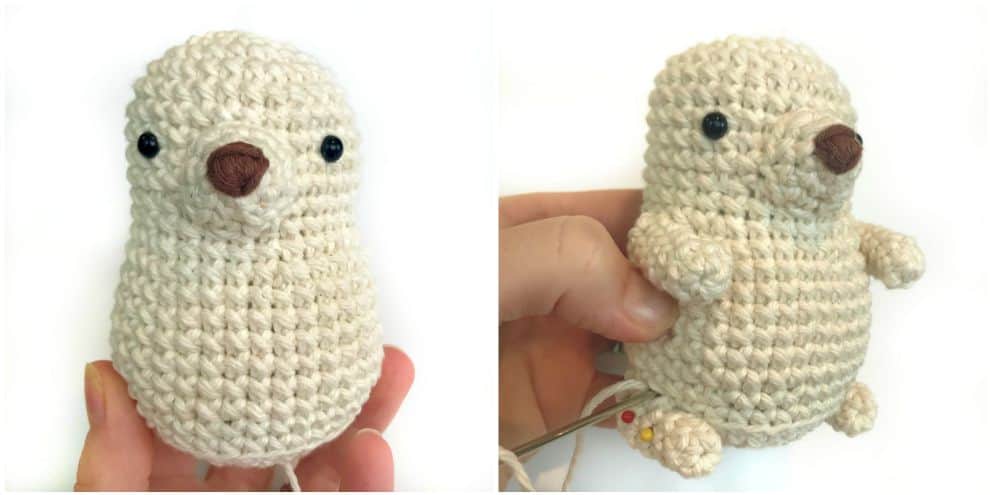
Head and Body:
You’ll be working from the top of the hedgehog’s head to the base of the body.
R1: Using cream, 6 sc into a magic ring. (6)
R2: 2 sc in each st around. (12)
R3: (Sc, 2 sc) 6x around. (18)
R4: (Sc in next 2 sts, 2 sc) 6x around. (24)
R5: (Sc in next 3 sts, 2 sc) 6x around. (30)
R6-R10: Sc in each st around.
R11: (Sc in next 8 sts, invdec) 3x around. (27)
R12: Sc in each st around.
R13: (Sc in next 8 sts, 2 sc) 3x around. (30)
Attach safety eyes between rounds 8 and 9, about 8 sts apart. Attach snout between the eyes. Begin stuffing as you go.
R14: (Sc in next 4 sts, 2 sc) 6x around. (36)
R15-R20: Sc in each st around.
R21: (Sc in next 10 sts, invdec) 3x around. (33)
R22: (Sc in next 9 sts, invdec) 3x around. (30)
R23: In back loops only, sc in each st around.
R24: (Sc in next 3 sts, invdec) 6x around. (24)
R25: (Sc in next 2 sts, invdec) 6x around. Continue stuffing completely. (18)
R26: (Sc, invdec) 6x around. (12)
R27: Sc2tog around.
Fasten off, using yarn needle to pull tightly through final stitches to close completely. Weave in end.
Arms and Legs (make 4):
R1: 6 sc into a magic ring. (6)
R2-R7: Sc in each st around.
Use end of hook to keep shape from turning inside-out as you go, if necessary. Fasten off, leaving long tail for attaching. Do not stuff.
Attach arms to sides of body.
Pin legs on each side of the base of the body. Sew along the entire length of the leg so it curves along with the shape of the body. Weave in ends.
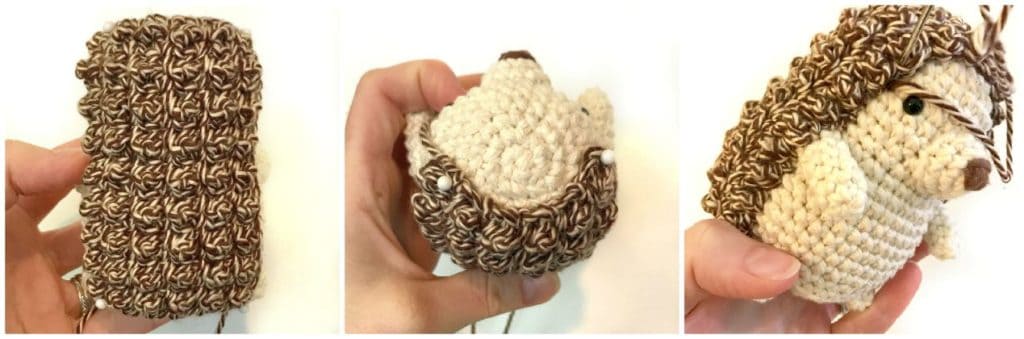
Coat of Spines:
You’ll construct the spines in two strips – one longer strip that will wrap from the base, across the top of the head, and down the other side and a shorter strip that will cover the remainder of the hedgehog in the back.
Long strip
Leaving long tail, ch 46.
R1: Sc in 2nd ch from hook and in each ch across. Ch 1, turn. (45)
R2: Sc in first st. *Tr in next st, sc in next st. Repeat from * across. Ch 1, turn.
R3: Sc in each st across. Ch 1, turn.
R4: Repeat Row 2.
R5: Repeat Row 3.
R6: Repeat Row 2.
Fasten off, leaving long tail.
Short strip
Leaving long tail, ch 20.
R1-R6: Repeat rows 1-6 of long strip, with a stitch count of 19 for each row.
R7: Repeat Row 3.
R8: Repeat Row 2.
R9-R12: Repeat rows 7-8.
Attach the short strip first, centered on the back of the hedgehog, the bottom edge even with the base of the hedgehog. Sew around entire perimeter of strip to attach.
Then, wrap the long strip from one side to the other, taking care to make it evenly spaced around the hedgehog’s face, arms, and legs (I recommend pinning into place to secure). It will slightly overlap both the short strip and limbs.
Sew around entire perimeter of long strip (I added a very small amount of loose stuffing under this strip as I sewed to puff the spines out a bit).
Attach ears:
Attach ears 2-3 rows above eyes, in front of spines.
To make a heart, follow the directions here (for the 1.75″ heart), then pin the heart inside the hedgehog’s arms. Using your yarn needle and cream yarn, attach the heart to the arms by weaving needle through one hand, through the heart, and through the other hand (repeating as needed).
I hope you’ve enjoyed making your own sweet little friend from this crochet hedgehog pattern. I love seeing your work, so make sure and tag me on Instagram @crochettoplay. Enjoy your finished hedgehog!
Looking for more free crochet patterns? Click here!
© 2024 Crochet to Play
All rights reserved. Designed and written by Jennifer Percival. This pattern is property of Crochet to Play. The written pattern and images are for personal use only. Please do not redistribute, transfer, or sell the pattern or images, in part or in whole. Thank you.
Hello! I saw your pattern online and just had to make him! He turned out amazing but he took a lot longer than he should have because I didn’t have the right yarn for the spines so I had to separate the threads from the contrasting color and crochet that with the regular strand of yarn. Could you maybe find a alternative yarn for the spines? They don’t carry that color anymore. Thanks again!
You could try I Love This Yarn in Marled Mocha. 🙂
Buena noche, consulta como se realiza sc2tog, esta hermoso el erizo me encanta, pero no entiendo como realizar ese punto, gracias por su comprensión y apoyo, bendiciones
🌷🌷
Hello! Unfortunately, my Spanish isn’t good enough to understand your question, but maybe someone else reading the comments can reply and help. 🙂
sc2tog significa dos puntos juntos, es decir una disminución
Hola yo te puedo decir haces un punto bajo en el siguiente punto y luego vuelves a meter en gancho donde hicistes el primer punto bajo y se hacen dos puntos bajos que es el aumento
Thank you for the pattern!!! I made it as a gift to my gf for san valentine’s day. I can´t wait to see her reaction I know she’s gonna love it.
We are in a long distance relationship. I’m planning to send it to her in our anniversary.
Thank you a lot :3
When it says back loops only do you continue for each round after that in the back loops or just that one round? 😊 thanks
It’s just for that one round. 🙂
I just finished making this little guy. The pattern was very easy to follow. Inspiration struck while making the heart. Instead of sewing it to my hedgehog, I added snaps to his paws and snaps to the sides of the heart. I used the heart directions as a springboard to make a clover leaf, then went searching on the web and found miniature flag, pumpkin, Christmas stocking and flower designs. All have snaps so I have a year round hedgehog to send to my daughter for Valentines Day. Thanks so much for the pattern and inspiration!
me encantó!!! pero no pude terminarlo, no supe cómo hacer las espinas, pero es bellísimo 😊
This is my first Amigurumi project. And it turned out awesome!!
I hate to buy more cotton yarn right now. Can I use Hobby Lobbys I Love this Cotton yarn for the whole Hedgehog.
Hello,
I love this pattern I made it using 2 strands of DK cotton together with a 6mm hook. It was probably about 15 cm high. I couldn’t access the exact spine yarn so I used a strand of beige and a strand of brown together and it came out perfectly. I sewed the eyes on using only black yarn and gifted it to a newborn. The parents loved it!
Thank you so much for this free pattern. My youngest daughter will love this.😘❤❤❤🙏🙏🙏
This was my first try at an animal. I just love him so much. I made this one to gift but I am going to have to have one for myself.
Thank you so much for this cute pattern!! I made it for someone I like and hopefully she likes it cuz it isnt exactly like yours but I’m happy with it! ❤
I was looking for a Valentine’s gift for my 4 year old daughter and I found this! Quick question, for the head and body, it’s a continuous round right? Not join (slip stitch) to the first stitch?
Yes, continuous rounds. 🙂
Hi. Cute pattern. Question about the spine: what size of hook and yarn is used? It looks like a mix of tan and brown, but I can’t tell.
Thanks!
Thanks! The hook is size 3.5mm and the yarn is I Love This Cotton in “Monkey” (made by Hobby Lobby).
What is the name /color and brand of the yarn for the back I clicked the link and it says error
The yarn is I Love This Cotton in “Monkey” (made by Hobby Lobby).
Love this pattern, just started making it for my grandchild. Question: is the snout crocheted ina spiral or joined and “separate” rows?
Joined in spiral rounds. 🙂
hiii. im totally making this for my bf’s mom! she will loveeee it ! tysm💙
How cute is this little guy!
Thanks.
Just wanted to check…
So the smaller piece of spines are completely covered by the bigger piece, right?
Thank you! Yes, the smaller section of spines is attached first and then the longer strip wraps around the edges.
Just finished this little guy! So cute. Nice pattern.
I’m glad you enjoyed it and made your own!
I see that you don’t want anyone selling your pattern (understandable), but what about selling finished products and crediting you as the designer?
Oh absolutely! It’s illegal to reproduce/copy/sell the pattern and images but anything you make from the pattern is yours and you’re free to sell it. 🙂
This is so cute! Thanks for offering it for free.
You’re so welcome! I’m glad you like it!