Changing Colors in Amigurumi: A Step by Step Guide
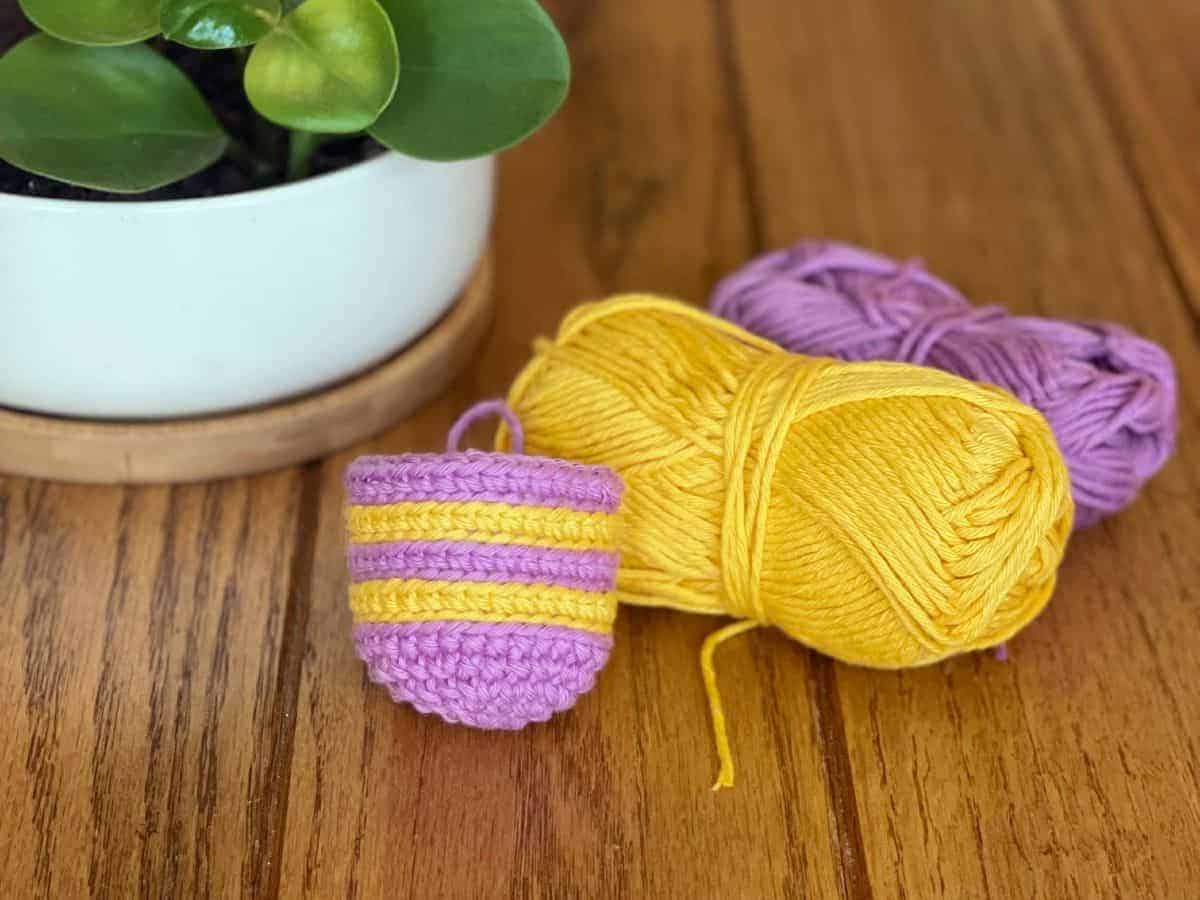
Anyone who knows me knows that I absolutely love stripes (I won’t even say how many striped shirts I have in my closet)! This love extends to amigurumi as well. The first time I saw Yan Schenkel’s Pica Pau characters with their crochet striped clothes, I swooned. But crocheting all those stripes means lots of changing colors in amigurumi.
Whether you’re a beginner or have lots of amigurumi experience, we all need to know – what’s the best way to make these amigurumi color changes? And what gives you the cleanest, most seamless results?
I dove into the most common methods for changing colors in amigurumi and have the results for you below. Take a look at each one and see which method is your favorite! I hope you find some new techniques to level up your stripe game.
This post contains affiliate links to products I recommend to my readers. If you click on one of these links and decide you’d like to make a purchase, I will make a small commission (at no extra cost to you).

What’s Unique about Changing Colors in Amigurumi?
Amigurumi is almost always worked in the round, as opposed to working in rows.
When crocheting in rounds, you have two choices at the end of each round. You can slip stitch and chain 1 to start the new round. However, this will give your work a seam.
Or, you can crochet “in the round”. This means when finishing one round, you just keep going. You start each new round by working into the first stitch of the previous round (this is one reason why stitch markers are so handy).
This method is great for creating a seamless look, because the rounds are essentially spirals, but it does create some issues with color changes. The last stitch of one round is a step “below” the first stitch of the next round, so color changes have a little step or jog.
No color change in the round perfectly eliminates this…only joined rounds can do that. You can also try this method of cutting, but it’s too fussy for me when crocheting multiple stripes. So let’s dive into some common no-cut techniques.
Changing Colors in Amigurumi
When crocheting in rows, it’s common to change colors simply by finishing a stitch with one color, then yarning over and pulling up a new loop with the new color. But this isn’t necessarily the best method to use when crocheting amigurumi.
Let’s look at four alternatives so you can pick the method you like best. They’re listed in order from least to most difficult (as I see it).
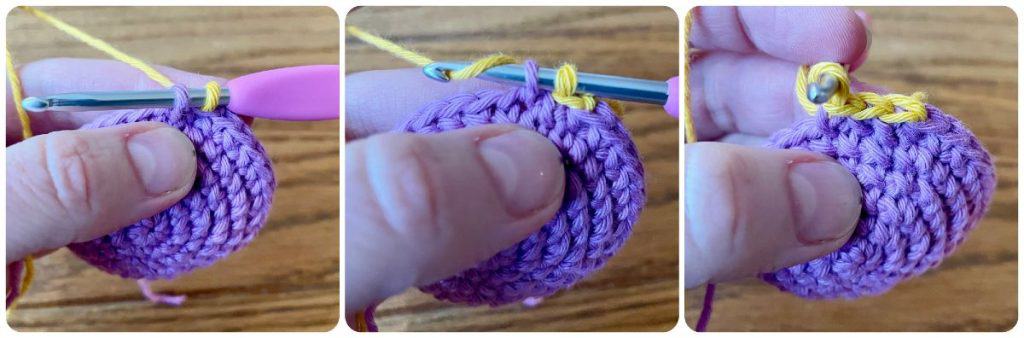
1. The Traditional Color Change
This is the first way I learned to change color in the round, and I find it to be the easiest. When finishing a round in one color, with the last two loops of the last stitch on your hook, drop the first color and yarn over and finish the stitch with the new color. Then continue, beginning the new round with the new color.
PROS
- Fairly easy
- Allows you to continue to crochet at your normal pace and tension
- Closely matches the method used in other types of crochet
CONS
- Leaves a “jog” due to being worked in a spiral round
- Can look uneven, especially between rounds

2. The Slip Stitch Method
To make the color transition a little bit smoother, you could try the slip stitch method. Repeat the same steps above for the traditional color change (finishing the last stitch with the new color). Then, begin the new round with a loose slip stitch instead of a single crochet.
This counts as a the first stitch of the new round, and results in a less severe jog between colors (but it is still present).

PROS
- Gives a less noticeable jog than previous methods
- Still fairly quick and easy to execute
cons
- Still leaves a slight jog
- Slip stitches can be tighter, and thus harder to work into when you begin the next round
- Still has a jagged, uneven look between rounds (not a problem if you like this look)

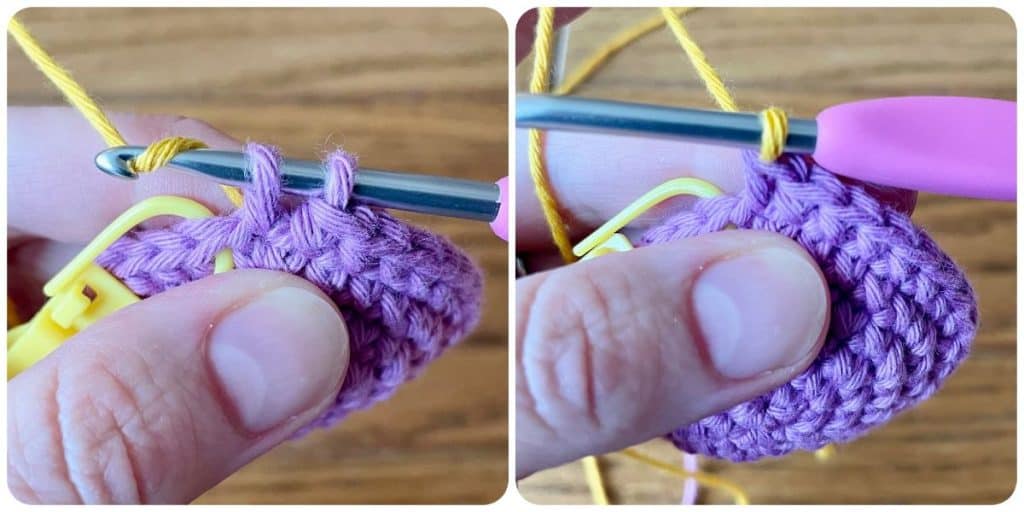
3. The Back Loops Only Method
Another option for changing colors in amigurumi is to work the new color into the back loops only (BLO) of the next round. The cleanest technique for this is to work one round of slip stitches into the back loops, and then another round of single crochets into the back loops of those slip stitches.
PROS
- Eliminates the jagged look between rounds
- Super clean lines
- Gives more texture to stripes (from the remaining front loop)
CONS
- Does not eliminate the jog
- You may not want the additional texture from the remaining front loops
- Can affect the round count and size of finished object
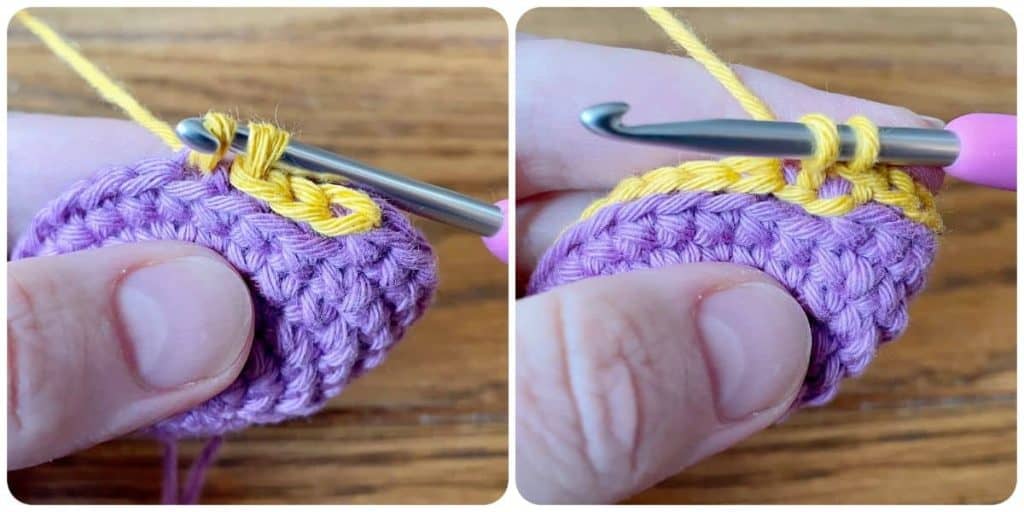
4. Half Color Changes
This is the most complicated of all the color change methods. Here are the steps: change to the new color as described in option #1 above, so the new color is on your hook. For each single crochet of the new round – insert hook, pull up a loop in the previous color, yarn over in the new color and finish the stitch. Repeat around. Then complete the next round in the new color.
PROS
- Eliminates the jagged look between rounds
- Super clean lines
CONS
- Much more complicated than other methods
- Takes more concentration and thus, more time
- Using both strands of yarn pulls the round below so that it indents a little
- Can make you adjust round count
- Does not eliminate the color jog

Final Thoughts
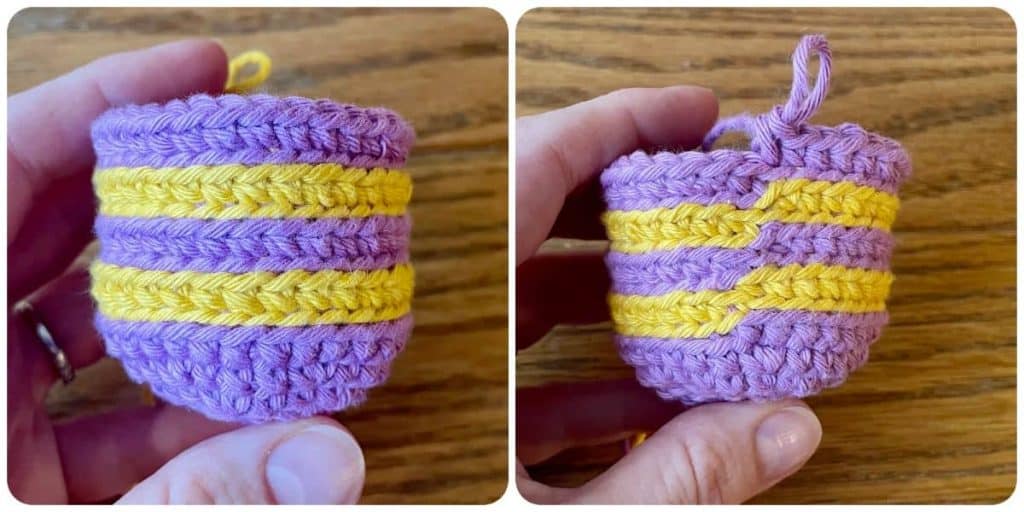
So which method is my favorite for changing colors in amigurumi? That just depends on the project! If there are minimal color changes that can be hidden by placing them towards the back of the toy, I just use the Traditional method.
But if the backs of the stripes are showing, and there are lots of them, I think the Half Color Change method gives the cleanest, most polished result.
Honestly, color changes in amigurumi really come down to trial and error, and seeing what methods you like the best. And when possible, sew your pieces together so that the color changes face inward. Problem solved!
Try it for yourself and let me know what you prefer in the comments below! In case my stitches look different than what you’re used to, I do all my amigurumi work with the yarn under method. I describe both yarn over and yarn under in detail in this blog post if you’d like to learn more!
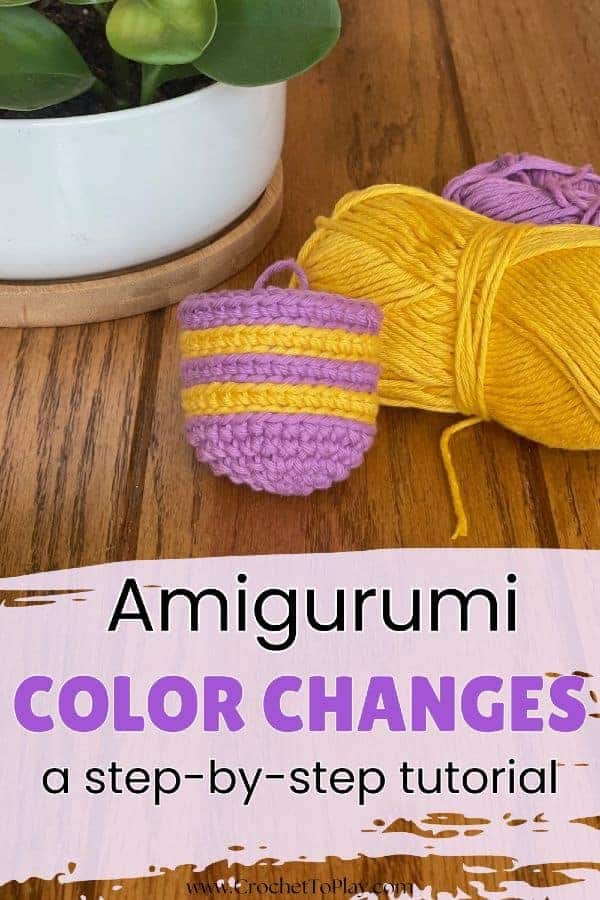
No time to try this today? Save it on Pinterest for later!
© 2026 Crochet to Play
All rights reserved. Designed and written by Jennifer Percival. This pattern is property of Crochet to Play. The written pattern and images are for personal use only. Please do not redistribute, transfer, or sell the pattern or images, in part or in whole. Thank you.
Thanks for breaking down all of these approaches, Jennifer! The photographs are very helpful in knowing which one to use to get different effects. Sometimes the traditional method is super-good-enough, but sometimes it’s worth the extra effort when you want a really clean line and I love how you’ve shown the details so clearly.
I’m so glad it was helpful! Thanks for your feedback.