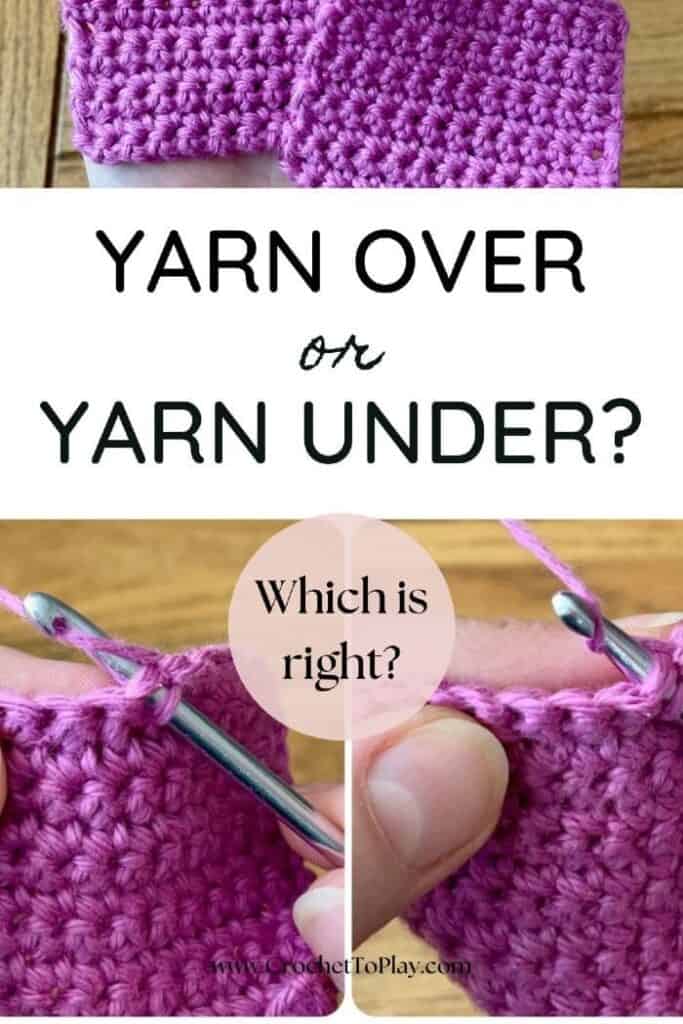
Yarn Over vs. Yarn Under
I have a confession to make. I was YEARS into my life as a crocheter before I realized there was a “right” way to crochet, and I wasn’t doing it! That’s right, I had no clue that there was a difference (and even a little debate) between the yarn over vs. yarn under methods.
In my defense, I was a self-taught crocheter before everyone went on YouTube to learn everything (which is amazing, I just didn’t do it). When I wanted to learn how to crochet, I checked out a fat stack of books from the library and got to work, following the instructions and pictures…or so I thought. What I actually did was teach myself to yarn under, and I taught myself so well that my muscle memory solidly ingrained it.
When I eventually found out I was crocheting “wrong”, I was mortified. There I was, a couple of years into designing and selling crochet patterns, and I was a fraud! Okay, not really, but that’s how I felt. So, I learned the difference between yarning over vs. yarning under, and I can help you understand it too. Spoiler alert: I still yarn under most of the time!
What’s the Difference, Anyway?
First things first: Let’s make sure we actually understand the difference between a yarn over vs. a yarn under, because it can be a little tricky to spot at first.
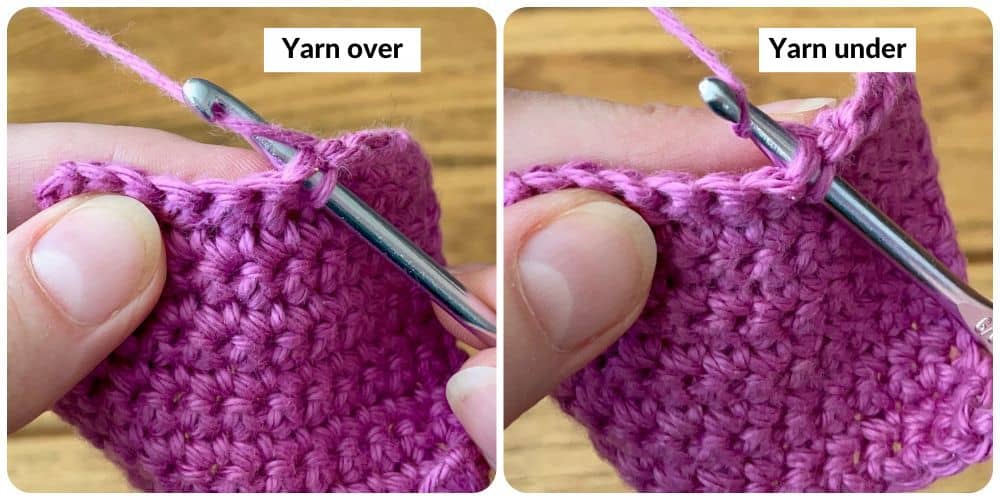
When you yarn over, you hook the yarn with the working yarn wrapped over the hook (see 1st photo). See how the yarn wraps over the hook, coming from the right side of the hook towards the left?
But when you yarn under, you hook the yarn with the working yarn under the hook, so that you’re “grabbing” the yarn as it comes from the left side of the hook (see 2nd photo).
Now, some people will tell you that the yarn under is more difficult to make or feels unnatural. I obviously can’t speak to this because it feels perfectly natural to me!
The way I taught myself was a combination of yarning under then yarning over. To do this, I insert my hook, yarn under, pull through, then yarn over to complete the stitch. This is what feels most natural to me.
I’ve never had any issues with tension or pain using this method. However, for some crocheters, yarning under causes more strain or wrist pain. This is definitely not the case for everyone and you know yourself best.
Which Method Should You Use?
As much as I wish I could tell you it doesn’t matter whether you yarn over or yarn under, there are differences you should understand to help you decide which method to use. Take a look at this chart:
| Yarn Over (YO) | Yarn Under (YU) |
| Traditional/”Correct” | Non-traditional/”Incorrect” |
| Stitches are taller | Stitches are shorter |
| Uses slightly more yarn | Uses slightly less yarn |
| Leaves more gaps (important in amigurumi) | Leaves fewer gaps (important in amigurumi) |
| Slightly looser | Slightly tighter |
| Slants more (important in tapestry crochet) | Slants less (important in tapestry crochet) |
| Stitches look traditional | Stitches have an “x” shape |
These differences are the most pronounced in single crochet. So, when you’re deciding to yarn over vs. yarn under, you have to base it on your project.
If you are working up something in single crochet where gauge is important, you’re going to want to match the designer’s stitches (the shorter stitches of yarning under can become a problem when matching gauge). When making garments, where drape is more of a factor, you should crochet by yarning over as well.
However, if you’re making amigurumi or a tapestry crochet project, I highly recommend yarning under! Since I make so much amigurumi, I continue to use my yu/yo method most of the time. I adjust to yo/yo when I need to, though it takes much more concentration for me. That muscle memory is strong!
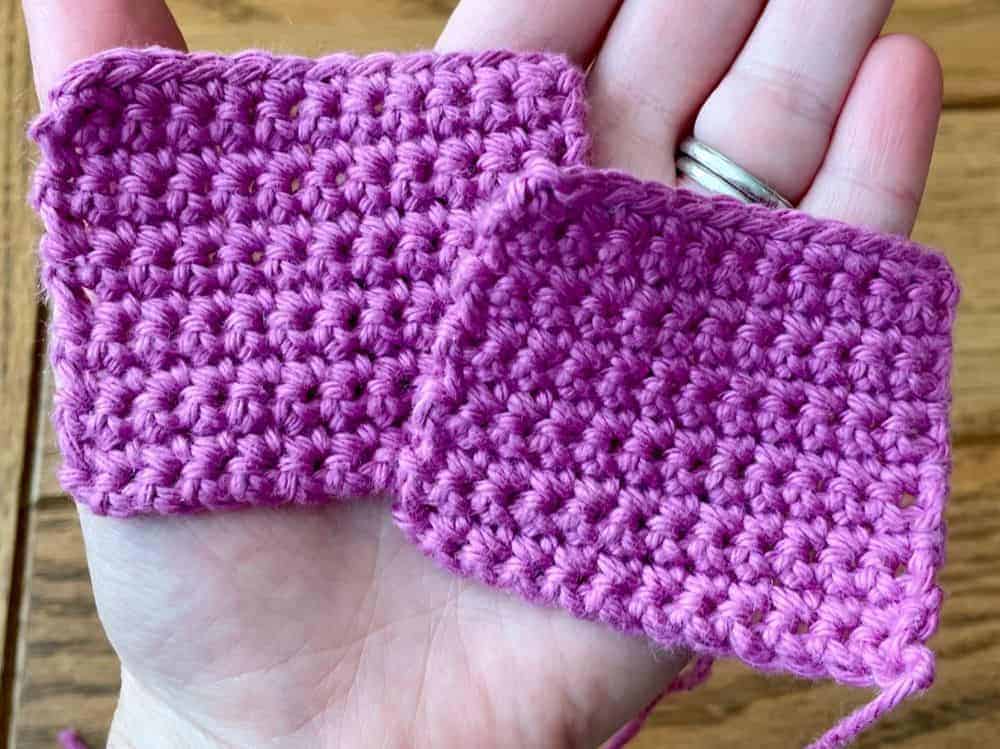
Take a look at these two amigurumi spheres. The left was made using yarn over and the right was made using yarn under. Can you see the v-shaped stitches vs. the x-shaped stitches?

More Information on Yarn Over vs. Yarn Under
It can be hard to see the difference between yarning over and yarning under, so I recommend watching videos to help yourself understand both techniques. Try watching this video by Nicki’s Homemade Crafts. She goes slowly enough to really show the differences and it’s worth the watch.
I hope this was helpful for you and that you feel a little more knowledgeable about your crochet techniques. Let me know in the comment which technique you prefer!
Save this on Pinterest as a resource for later!
© 2026 Crochet to Play
All rights reserved. Designed and written by Jennifer Percival. This pattern is property of Crochet to Play. The written pattern and images are for personal use only. Please do not redistribute, transfer, or sell the pattern or images, in part or in whole. Thank you.
Wow! You sound just like me! I have been doing YU all my crochet days too, until I started doing the Instructor training course recently, and discovered what I was doing. I agree, I think its much easier to YU but I will now start teaching the YO for all stitches.
I’m a self-taught crocheter. I’ve always done YO since that’s what the books said YEARS ago! I decided to try amigirumi in 2016 when I saw a dragon that I wanted/needed to make. I got hooked! I love making my creatures! I had never heard of YU until recently and am making my first one using the YU/YO technique. It’s been easier to do than I thought it would be. Also, I’ve gotten sucked into your blog today and am enjoying it… this was my third article this morning. Thanks for all your info!
Changing techniques back and forth after years is impressive! So glad you’re enjoying the blog.
How would you do a double crochet with yarn under? I’m working with a yarn that is loosely twisted, so every time I yarn over, the yarn untwists more and more until eventually it splits and is impossible to work with. But I can’t figure out how to yarn under while double crocheting to combat the unraveling twist.
It’s the same yarn under motion as with single crochet, but you may have to twist your wrist more to make it manageable. Yarn that untwists is tough to work with!
You know I never even knew this was “a thing” until I watched a video where I noticed someone’s SC technique looked like under then over. Wait what??! Started googling which led me here. Very informative, thank you so much! I have crocheted for quite a while and it never even occurred to me… I learnt from my Granny (she taught me yarn over by the way), so I didn’t watch too many “how to stitch” videos, just occasional ones for specific things like colour changing or help with a particular pattern, or unusual stitches I don’t know. I’m just starting to get into amigurumi, so I might try the under / over technique for closing some gaps. Love learning new ways!
Isn’t it amazing how much there is to learn in crochet?! I love this technique for amigurumi so you’ll have to let me know what you think once you try it. 🙂
So I learned both in books in the 1980’s when I taught myself. I like Y/O for ease of crochet but doing Amigurumi’s I use the Y/U but always want to slip up and Y/o on the pull through. It’s just easier, but I do full Yarn Under, both the catch and pull through. I get used to it and pretty quick but I always find the pull through stich I have to add a twist to get it through the stiches without spitting my yarn making the Yarn Over pull through easier. This twist to pull the yarn through without catching anything in the stich is probably what causes the wrist fatigue, not the initial yarn under. I don’t think one is wrong or right, just a personal choice and each suited to different projects. Knowing which is used though is very helpful if trying to match gauge. When learning it always asked me to do a test swatch to match gauge. I know now and my gauge is rarely an issue as I hold my wool quite snuggly with either and will needle up or yarn up to meet a gauge if it is important to the outcome.
I have found that many yarns “unwind” if you are using yarn over, leaving you with 3-5 straight strands of thread. Yarn under “ rewinds them. So I tfrequently switch back and forth. Nobody seems to notice, but of course I only crochet for friend and family!!
Hello! Glad I found this. Doing my first ever project with no previous experience and it’s been a baptism of fire.
I think I’ve been doing a YU/YO single crochet. The first time I pull through it’s been a YU and then the second pull through to finish the single crochet is a YO. Is that what you mean by your funky combo?
Yep, that’s exactly what I mean! 🙂
Funnily enough, I prefer the look of the funky singles from my first attempt! I’ve done it a second time now with the proper YO and while neater (from more practice) I feel like it looks more gappy. The funky single seems tighter to me
I’m so glad to hear that you also do a funky yu/yo technique- I got so confused by the YouTube videos and my rows didnt match the look of either yo or yu and I realized I was probably mixing them. Glad to hear someone more experienced also doing q mixed yarn ov-der!