Crochet Valentine Envelopes
This post contains affiliate links to products I recommend to my readers. If you click on one of these links and decide you’d like to make a purchase, I will make a small commission (at no extra cost to you).
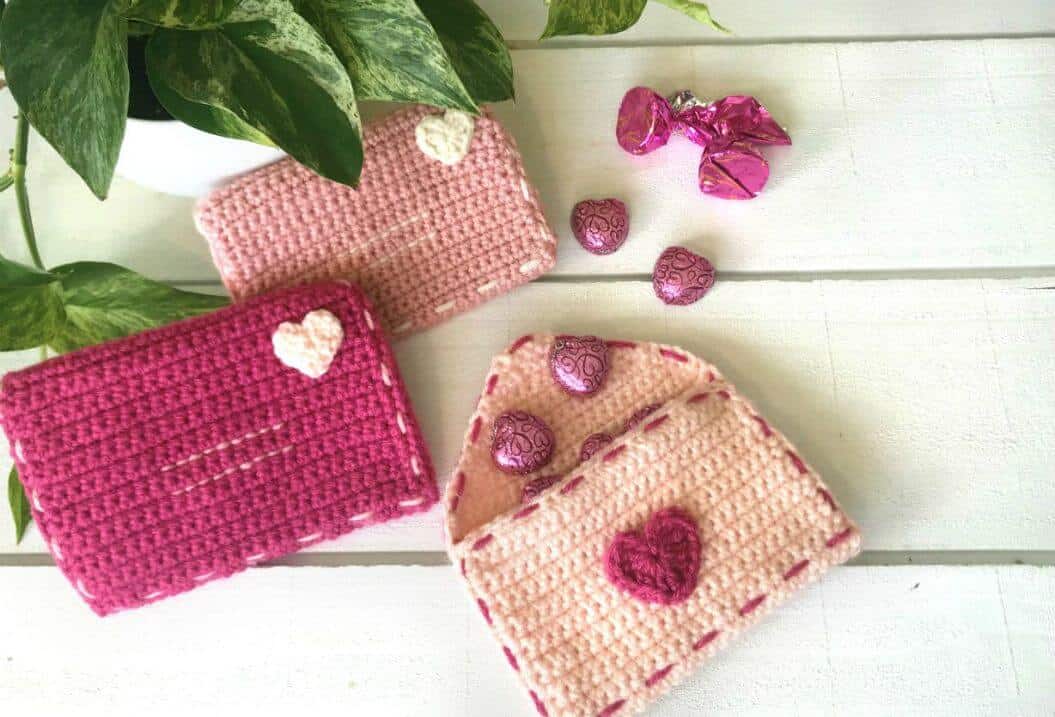
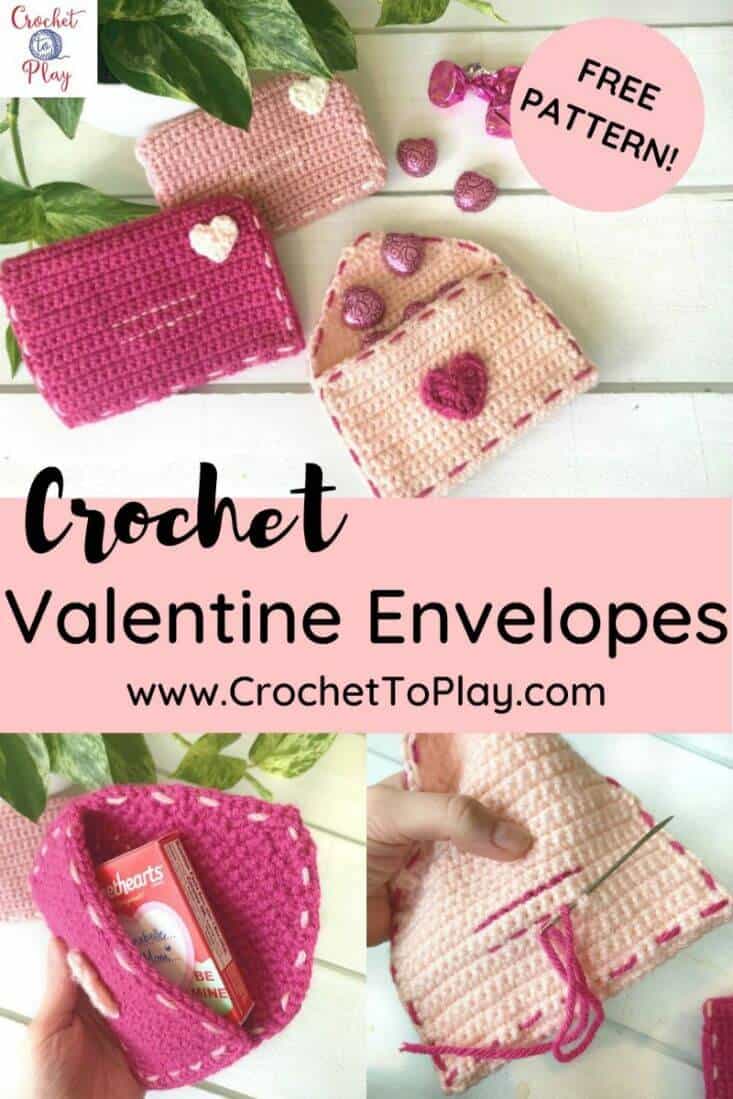
A few years ago, I made my kids some crochet valentine envelopes at the last minute before Valentine’s Day. I tucked in some quick notes and some candy and gave them out at breakfast. To me they were a small thing, but my kids loved them so much! They expected them the next year, and the next.
At the time, I meant to write down the pattern to be able to share it. But, like so often happens in life, I put it on the back burner…until now! I recently raided my yarn stash and made some brand new envelopes, with step by step pictures so you could see how to make your own. They’re easy to work up and can be made at the last minute with any worsted weight yarn you have lying around. Let’s get started!
Crochet Valentine Envelopes
Materials Used:
- Any worsted/aran weight (4) yarn – I used acrylic yarn in my stash that had been leftover from other projects and is no longer available, but see here for similar Paintbox Simply Aran yarn in colors ballet pink, blush pink, and lipstick pink
- Size G/4.25mm and E/3.5mm crochet hooks
- Yarn needle
- Scissors
Stitches/Abbreviations Used:
- magic ring
- st – stitch
- ch – chain
- sl st – slip stitch
- sc – single crochet
- sc2tog – single crochet 2 together
- hdc – half double crochet
- dc – double crochet
- tr – triple crochet
Finished Size:
The finished size of your envelopes will vary based on your tension and the yarn you choose. Gauge is not particularly important for this pattern, but for reference, my envelopes measure 6″w x 4″h when closed (18 stitches and 20 rows = 4 inches).
Crochet Envelope Pattern
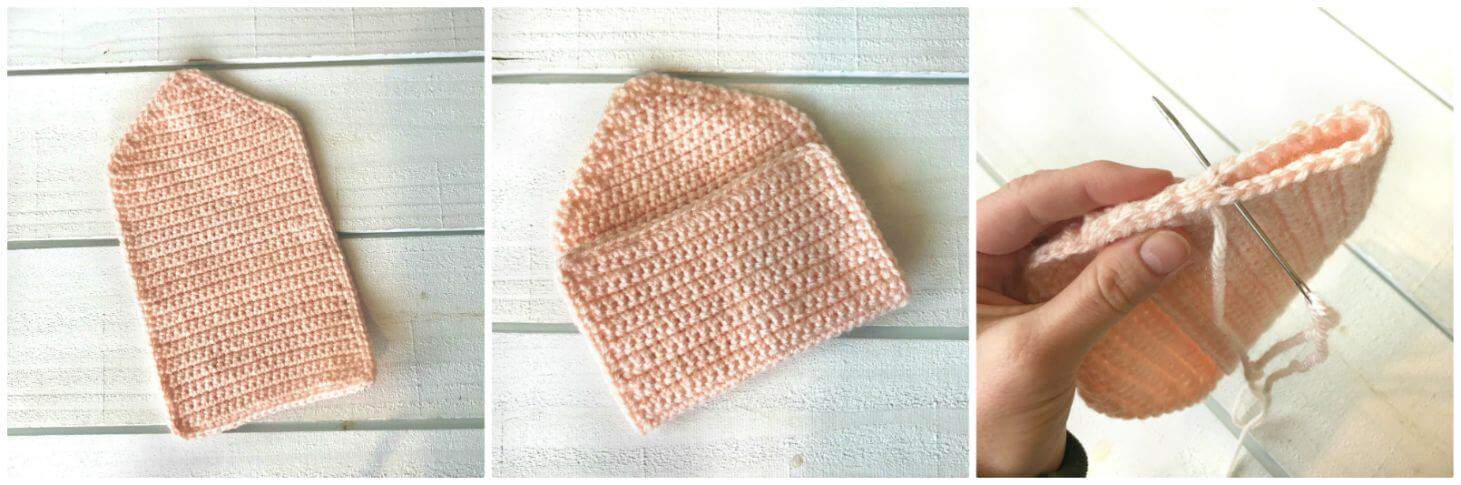
Using main color and size G hook, chain 25.
R1: Sc in 2nd ch from hook and in each ch across. Ch 1, turn. (24)
R2-R38: Sc in each st across. Ch 1, turn.
R39: Sc2tog, sc in next 20 sts, sc2tog. Ch 1, turn. (22)
R40: Sc2tog, sc in next 18 sts, sc2tog. Ch 1, turn. (20)
R41: Sc2tog, sc in next 16 sts, sc2tog. Ch 1, turn. (18)
R42: Sc2tog, sc in next 14 sts, sc2tog. Ch 1, turn. (16)
R43: Sc2tog, sc in next 12 sts, sc2tog. Ch 1, turn. (14)
R44: Sc2tog, sc in next 10 sts, sc2tog. Ch 1, turn. (12)
R45: Sc2tog, sc in next 8 sts, sc2tog. Ch 1, turn. (10)
R46: Sc2tog, sc in next 6 sts, sc2tog. Ch1, turn. (8)
R47: Sc2tog, sc in next 4 sts, sc2tog. Ch 1, turn. (6)
R48: Sc2tog, sc in next 2 sts, sc2tog. Ch 1, turn. (4)
R49: Sc2tog twice across. Ch 1, turn. (2)
R50: Sc2tog. Do not fasten off, but weave in first end.
From where you are, sc evenly around entire shape so the edges look finished.
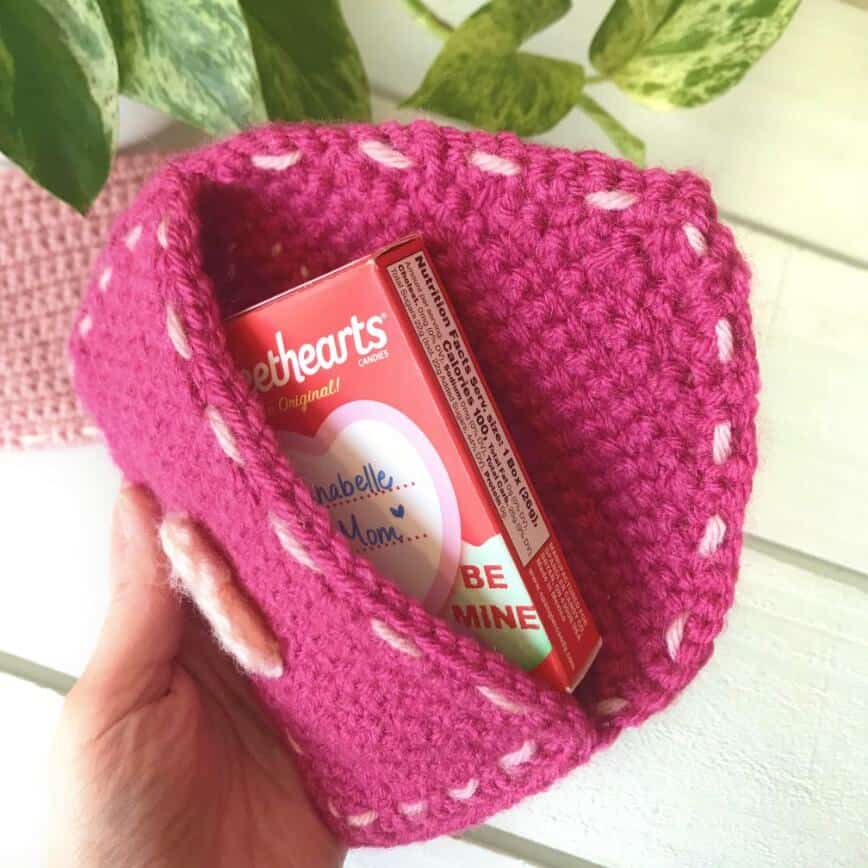
Fold envelope as pictured. Using yarn needle and main color yarn, sew sides together.
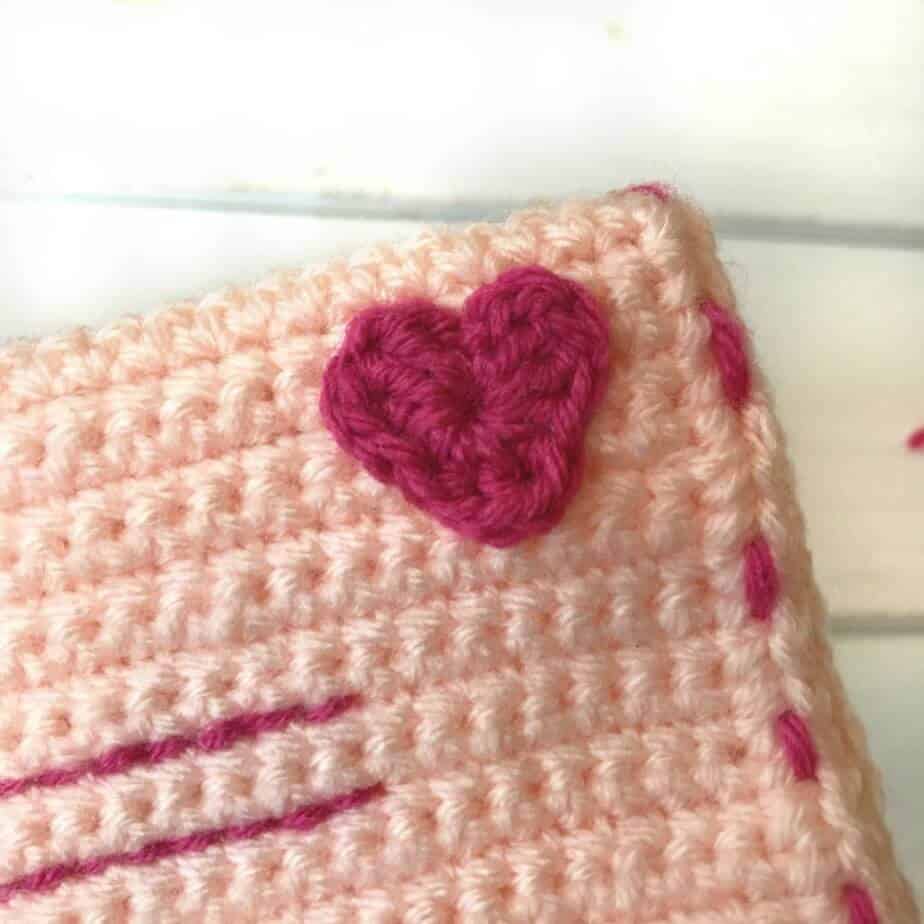
Then, use a contrasting color to stitch around the entire perimeter of the envelope, as shown, around both front and back. On the front of the envelope, stitch evenly across the top and bottom of a row in the middle as pictured (where you would write an address).

Small Heart
Using size E hook, in a contrasting color, make a magic ring and ch 2.
In the ring:
3 dc, ch 1, 2 hdc, ch 1, 1 dc, ch 1, 2 hdc, ch 1, 2 dc, ch 2, slip st and fasten off, pulling long tail through.
Weave in the original yarn tail from the magic ring. Use your yarn needle and ending yarn tail to attach this small heart to the upper right-hand corner of the envelope (like a stamp).
Large Heart
Using size G hook, in a contrasting color, make a magic ring and ch 3.
In the ring:
3 tr, ch 1, 3 dc, ch 1, 1 tr, ch 1, 3 dc, ch 1, 2 tr, ch 3, slip st and fasten off, leaving long tail. Again, weave in the original yarn tail from the magic ring. Then use your ending yarn tail to attach the large heart to the back of the envelope as shown. Leave the top of the heart unsewn so you can tuck the tip of the envelope flap into it.

And that’s it! Who will you make your crochet valentine envelopes for? I’m going to give mine to my kids again, with more candy inside and cheesy love notes from mom. If you like this pattern, please use the share buttons to pass it along to your friends! And as always, feel free to tag me @crochettoplay on Instagram to show me what you make. Happy Valentine’s Day!
Click here to save this post on Pinterest for later!
Look for more free Crochet to Play patterns here!
© 2026 Crochet to Play
All rights reserved. Designed and written by Jennifer Percival. This pattern is property of Crochet to Play. The written pattern and images are for personal use only. Please do not redistribute, transfer, or sell the pattern or images, in part or in whole. Thank you.
Making several of these these this year. They are SO cute!! The small hearts gave me some trouble but with a little practice I finally got it. A video on how to properly make those might be helpful. Thanks for sharing your pattern!
I seriously love this little envelope! It’s so adorable. I’m going to be making these for my kids class parties to go along with their other Valentine’s goodies!