
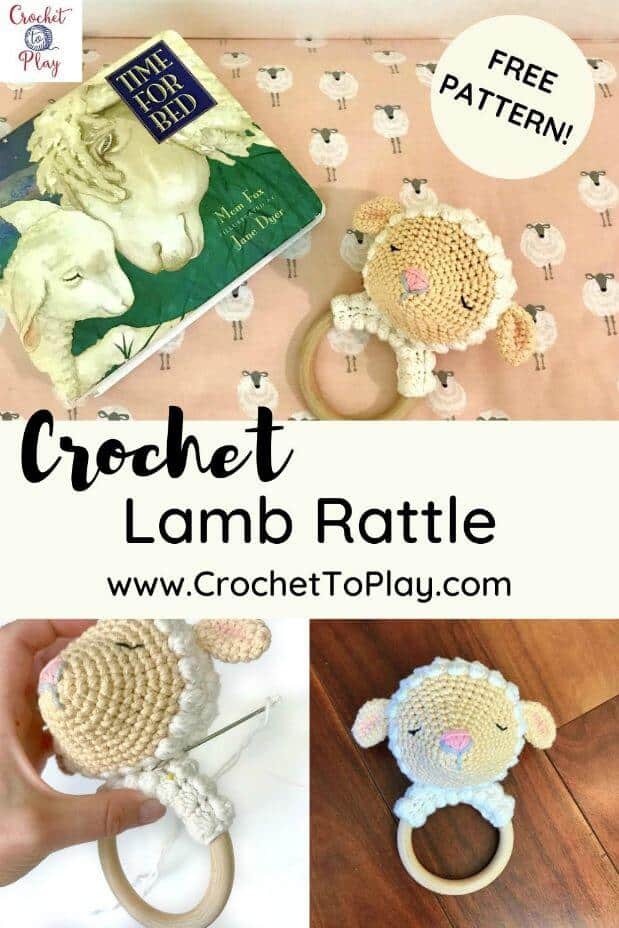
Crochet Lamb Rattle
This post contains affiliate links to products I recommend to my readers. If you click on one of these links and decide you’d like to make a purchase, I will make a small commission (at no extra cost to you).
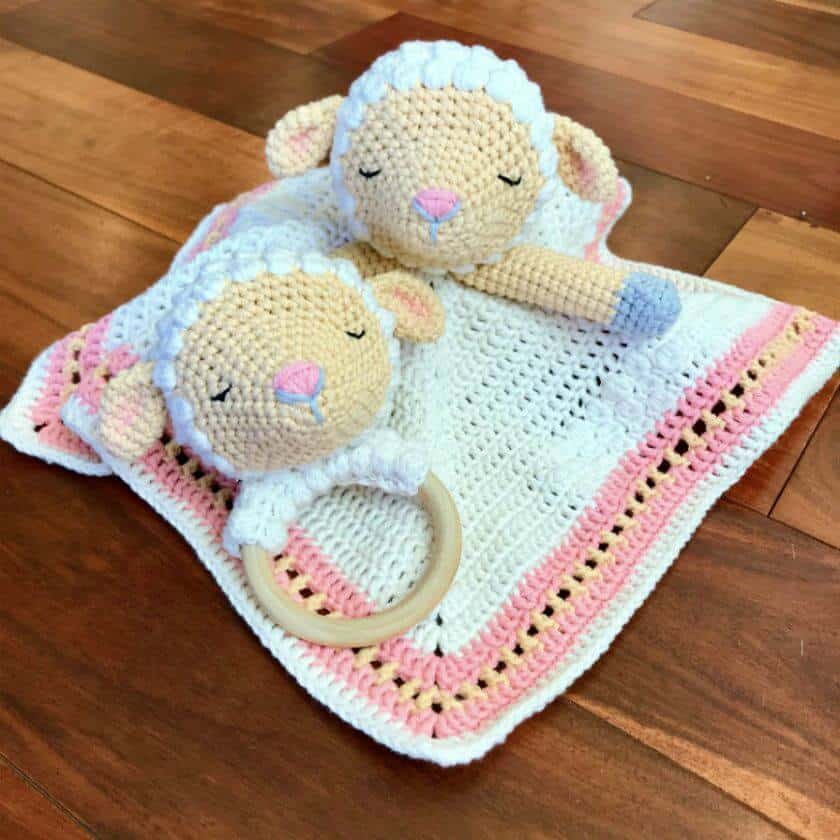
I’m always drawn to a cute Easter basket stuffed with jelly beans, chocolate bunnies, and some kind of sweet toy. I made my first crochet lamb (pattern here) a few years ago and, this year, I wanted to re-work the idea for some baby toys. Since I can never just make one thing, I decided to make a crochet lamb rattle and a lovey as a matching set. I pictured them in soft colors, made from cotton yarn, and with sleeping, embroidered eyes. My friends at LoveCrafts provided super soft Paintbox Yarn, perfect for what I had in mind for the project.
Then all of our worlds were rocked by the coronavirus. And even though our family has been incredibly blessed during this time, I was thrown off of the crochet track! Needless to say, I missed my Easter deadline for these patterns. The beautiful thing about being a crochet designer, however, is that it really is a craft for all seasons. A crochet lamb rattle can be made anytime! Maybe for a baby shower now, or ahead of time for the next Easter. So even though my initial plans fell by the wayside, I decided to share these toys with you now because they’re too sweet to keep to myself any longer!
In this blog post you’ll find all the directions you need to crochet your own lamb rattle. If you’d rather make both the lamb rattle and the lamb lovey, the premium versions of these patterns are bundled here on Ravelry or here on Etsy. The paid PDF version of this pattern bundle includes step by step instructions and photo tutorial.
No time to make your crochet lamb rattle today?
Pin this post for later!
Crochet Lamb Rattle Pattern
Materials Used:
- Yarn – Paintbox yarns in the following colors (less than one 50g ball each):
White – “Champagne White”
Beige – “Light Caramel”
Gray – “Stormy Grey”
Pink – “Blush Pink” - Size US E/3.5mm crochet hook
- Yarn needle
- Stitch marker
- Stuffing
- Black embroidery thread
- Wooden teething ring (can be found on Etsy or here on Amazon) – size pictured is 3” in diameter
- Rattle disc (can be found on Etsy or here on Amazon)
Stitches/Abbreviations Used:
- R – round/row
- magic ring
- ch- chain
- sl st – slip stitch
- sc – single crochet
- dc – double crochet
- sc2tog – single crochet 2 together
- bobble st – Yarn over, insert hook into stitch, yarn over and pull up a loop (3 loops on hook). Yarn over and pull through the first 2 loops on your hook. Yarn over, insert hook into same stitch, yarn over and pull up a loop (4 loops on hook). Then, yarn over, pull through first 2 loops on hook. Repeat two more times, until you have 6 loops on your hook. Yarn over, pull through first 2 loops on hook. Yarn over, pull through all remaining 5 loops on hook. This completes one bobble stitch.
- invdec –invisible decrease (an alternative to the sc2tog stitch). To invdec, insert your hook through the front loop of the indicated st, then insert your hook into the front loop of the next st. Your hook is now inserted into the front loops of both stitches you’d like to decrease into one stitch. Yarn over and draw up loop through both sts, then yarn over and pull through two loops on hook.
Finished Size:
The lamb rattle pictured measures about 6.5” from the top of the head to the bottom of the wooden ring. Your personal tension, and if you substitute a different yarn or hook size, may affect the measurements of your finished rattle.
Pattern:
Head
You’ll be working in continuous rounds, starting with the front of the lamb’s face.
R1: Using beige yarn, 6 sc in a magic ring. (6)
R2: 2 sc in each st around. (12)
R3: (Sc, 2 sc) 6x around. (18)
R4: Sc in each st around.
R5: (Sc in next 2 sts, 2 sc) 6x around. (24)
R6-R7: Sc in each st around.
R8: (Sc in next 3 sts, 2 sc) 6x around. (30)
R9: (Sc in next 4 sts, 2 sc) 6x around. (36)
R10: (Sc in next 5 sts, 2 sc) 6x around. (42)
R11: Sc in each st around.
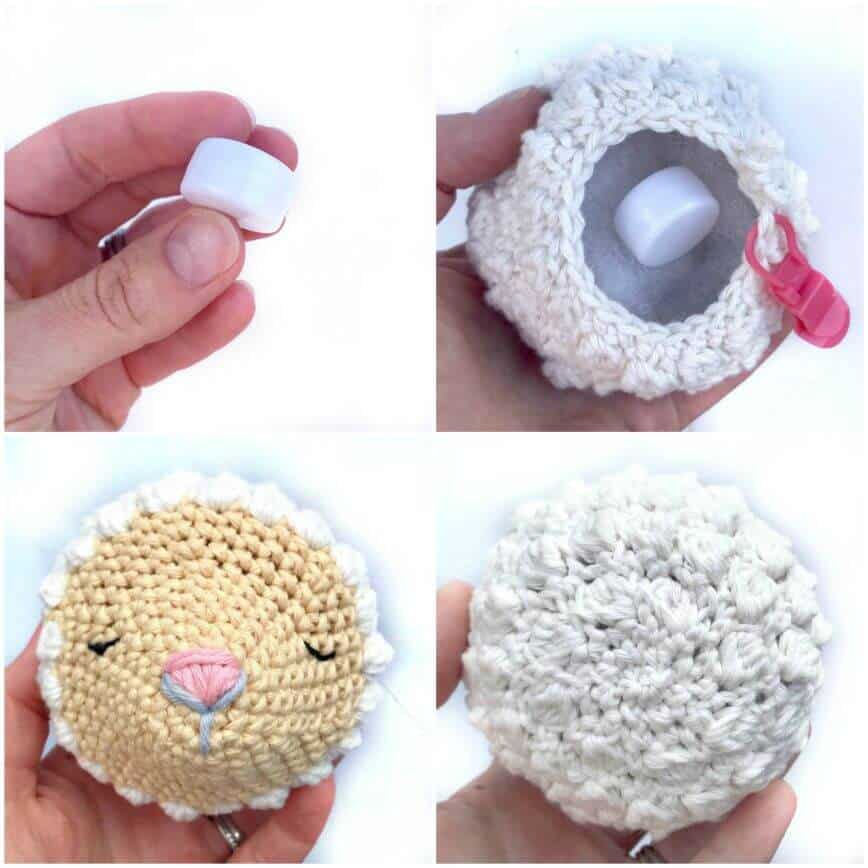
I recommend embroidering the nose and the eyes at this point. To embroider the nose as pictured, first use gray yarn and a yarn needle to make a Y shape. Then, use pink yarn to fill in the top of the Y. Using black yarn or embroidery thread, stitch eyes as pictured – bringing needle across about three stitches, then tacking down in a curve.
R12: Using white yarn, (bobble st in next st, sc in following st) 21x around. (42)
R13: Sc in each st around.
R14: (Bobble st, sc) 21x around.
R15: (Sc in next 5 sts, invdec) 6x around. (36)
R16: (Bobble st, sc) 18x around.
R17: (Sc in next 4 sts, invdec) 6x around. (30)
R18: (Bobble st, sc) 15x around.
R19: (Sc in next 3 sts, invdec) 6x around. (24)
Slightly stuff the head, insert the rattle disc into the middle of the stuffing, and continue stuffing as you go.
R20: (Bobble st, sc2tog) 8x around. (16)
R21: (Sc in next 2 sts, invdec) 4x around. (12) Continue stuffing
R22: (Sc, sc2tog) 4x around. (8)
Make sure head is completely stuffed, then fasten off, using long tail to pull final round of stitches into a tight circle. Weave in ends.
Ears (Make Two)
R1: Using beige, 6 sc in a magic ring. (6)
R2: (Sc, 2 sc) 3x around. (9)
R3: Sc in each st around.
R4: (Sc in next 2 sts, 2 sc) 3x around. (12)
R5-R6: Sc in each st around.
R7: (Sc in next 2 sts, invdec) 3x around. (9)
R8: (Sc, invdec) 3x around. (6)
Fasten off, leaving long tail. Flatten shape and use yarn tail to sew open end of ears shut. I used a pink crayon to color the inside of the ears pink. Pinch to make a crease and attach to sides of the lamb’s head, at about row 14 of the head.
Teething Ring Cover
R1: Using white, ch 17.
R2: Sc in 2nd chain from hook and in each st across. Ch 2, turn. (16)
R3: (Bobble st, sc) 8x across.
R4: Sc in each st across. Ch 2, turn.
R5-R8: Repeat rows 3-4 two times.
Wrap cover around top of wooden ring, and use yarn needle to sew together. Then, attach the head so it is centered. You will need to thoroughly stitch through the base of the head into the ring cover to keep it stable.

I hope you enjoyed making your own crochet lamb rattle! It’s sure to bring smiles to whoever receives it! I love seeing your work, so make sure and tag me on Instagram @crochettoplay.
Looking for more free crochet patterns? Click here!
© 2026 Crochet to Play
All rights reserved. Designed and written by Jennifer Percival. This pattern is property of Crochet to Play. The written pattern and images are for personal use only. Please do not redistribute, transfer, or sell the pattern or images, in part or in whole. Thank you.
thanks so much! super cute and clear tutorial
Great post