How to Crochet a Magic Ring
When I was a new crocheter, I fell in love with amigurumi. I quickly learned that the magic ring was an important skill for my new hobby, and now I use this technique all the time! This beginner-friendly guide will teach you how to crochet a magic ring with ease, too.
Why is the magic ring such a popular crochet technique? There are two main reasons:
First, magic rings are adjustable, which makes them ideal when crocheting in the round. This means that if you start your work with a magic ring, you can eliminate the open hole that is left by other methods (more on that below).
Second, because magic rings are adjustable, you can work a variety of stitches into them – both the number and type of stitches can vary but the magic ring will still work.
This post contains affiliate links to products I recommend to my readers. If you click on one of these links and decide you’d like to make a purchase, I will make a small commission (at no extra cost to you).
What Does the Magic Ring Replace?
If you’ve crocheted in the round before (rather than in rows), you may have started something like this – chain 2, slip stitch into the first chain, then begin working your stitches into that ring.
Unfortunately this method leaves an open hole in your work. And if you’re going to be stuffing a toy, as with amigurumi, this is not ideal.
So what’s the solution? You guessed it – a magic ring! Let’s walk through it step by step!
I recommend using a worsted weight yarn in a light color to practice, along with a larger sized hook like this one.
How to Crochet a Magic Ring
While occasionally you may see it called a “magic circle” or “magic loop”, magic ring is the most common crochet terminology. If you’re following a crochet pattern, you may also see this abbreviated as MR.
Let’s take a look at a breakdown of each step of making a magic ring.
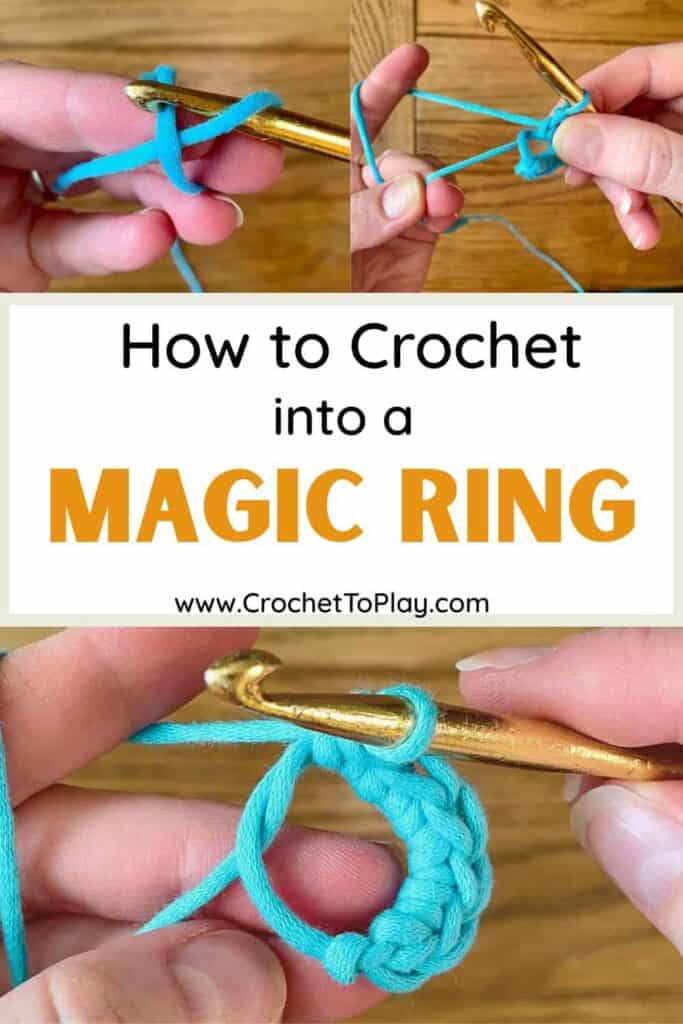
Step One: Wrap Yarn Around Fingers in X Shape
Although there are multiple methods, when I make a magic ring, I start in exactly the same way as I do when I start a slip knot.
With your loose yarn end hanging down your palm, wrap the yarn behind and around your index and middle fingers, as pictured, making an X shape.

Step Two: Hook the Yarn
Insert your hook under the side of the X closest to the hook, then grab the yarn (the other side of the X), and pull through.

Step Three: Pull Up a Loop
With the yarn you just grabbed, loosely pull up a small loop. Use your thumb and forefinger to pinch the loop with your non-dominant hand to keep the shape in place.

Step Four: Chain One
Continuing to pinch the loop (so it doesn’t just fall apart), chain 1. This locks the loop into place and does not count as a stitch (when using single crochet stitches for the rest of the ring).

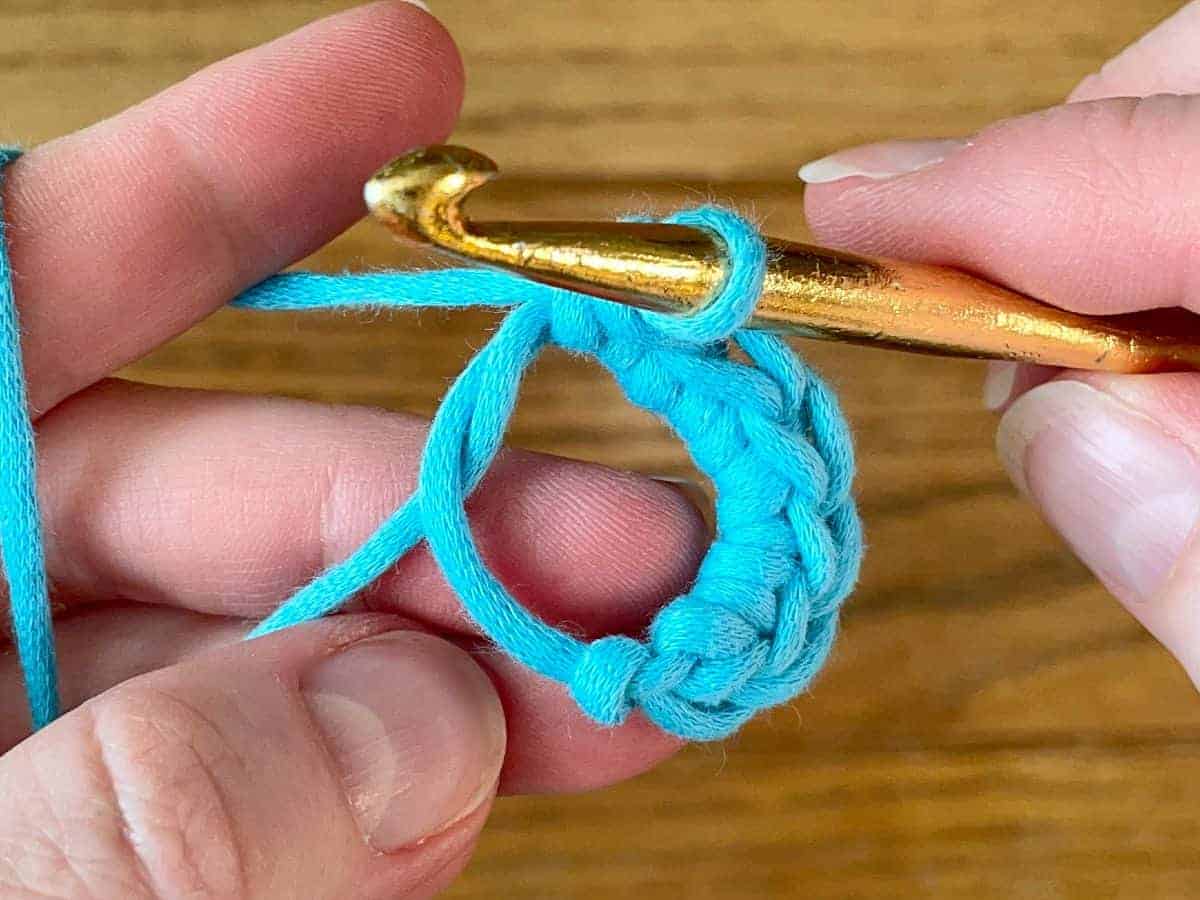
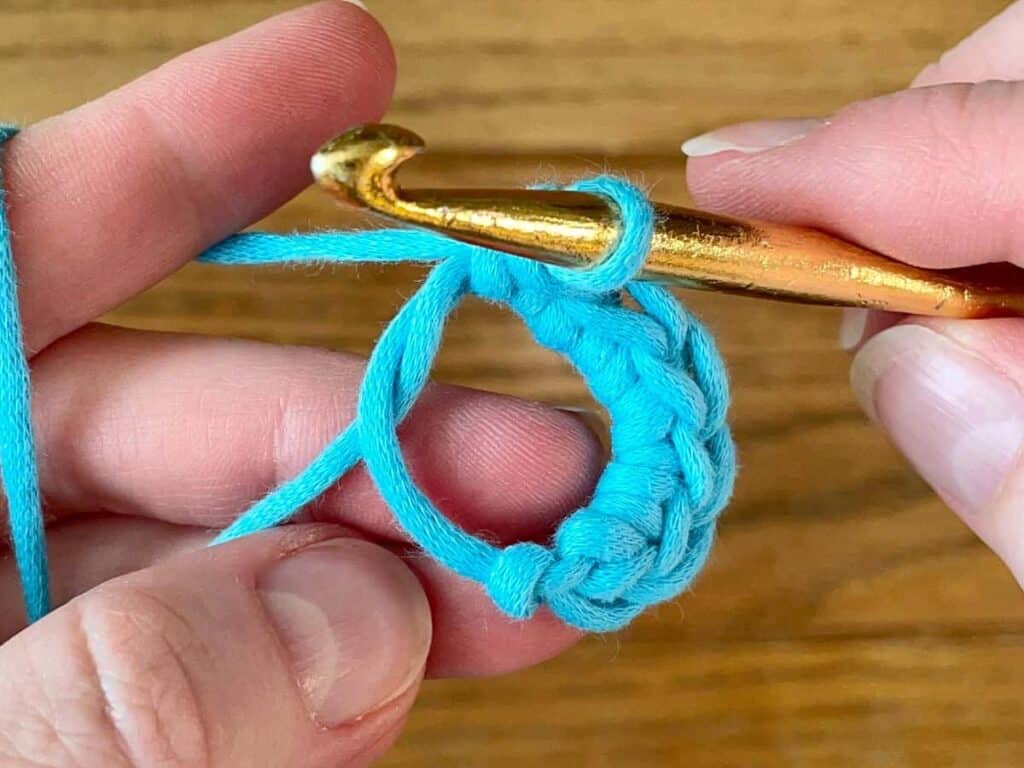
Step Five: Stitch into the Loop
Begin working the indicated number of stitches into the loop. When making amigurumi, this first round is usually 6 single crochet stitches, but any basic stitch or number of stitches can be worked into a magic ring.

Note: if a pattern calls for taller stitches such as double crochet to be worked into the ring, it will often prompt you to chain 2 and this may then count as a stitch.
If you find your magic ring is a little too loose to easily work into, make it smaller by pulling a bit on the loose yarn tail.
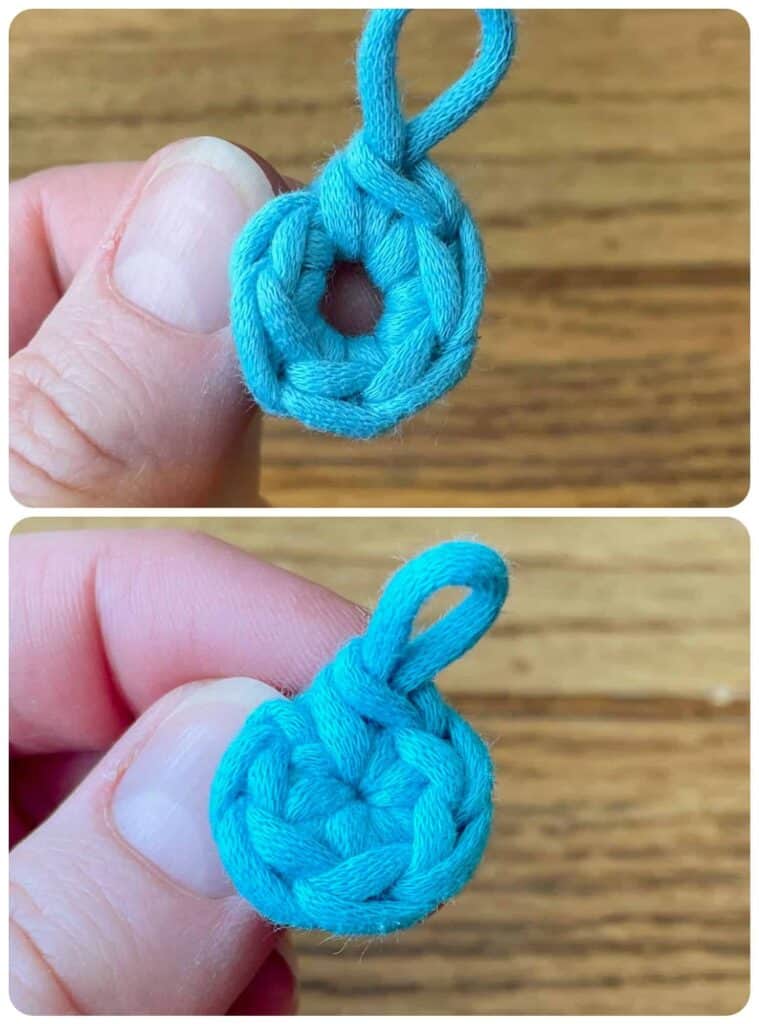
Step Six: Pull the Yarn Tail to Close the Circle
Once you have crocheted the number of stitches needed for your first round, gently pull the beginning yarn tail. Continue pulling until the ring is completely closed.
As you increase the size of your work with your additional rounds, you can further secure this yarn tail. Just weave it in between your stitches on the wrong side of your work.

When and Why to Use a Magic Ring
Even if you’re not into amigurumi, magic rings are really useful for any crochet that is worked in the round.
For example, I use magic rings when beginning hats, baskets, and even some granny squares! Anytime you’re working in the round and don’t want a beginning hole, the magic ring is the right choice.
I hope this tutorial was helpful for you as you learn the magic ring for yourself! Let me know in the comments what you’ll use this method for.
If you’d like to see a video tutorial, check out these left-handed and right-handed guides by Planet June.
If you’d love to learn more skills to improve your amigurumi, try these. And if you’d like to see more stitch tutorials, click here.
No time to crochet today? Save this on Pinterest for later!
© 2026 Crochet to Play
All rights reserved. Designed and written by Jennifer Percival. This pattern is property of Crochet to Play. The written pattern and images are for personal use only. Please do not redistribute, transfer, or sell the pattern or images, in part or in whole. Thank you.