How to Fasten Off in Amigurumi
When you’re reading a crochet pattern, you’ll often come across directions telling you to “fasten off”, or even just using the abbreviation “FO.” What does this mean, and how can you best fasten off when you’re making amigurumi?
Fastening off means cutting your project from the yarn in a way that its stitches won’t start to unravel. All types of crochet fasten off in basically the same way, using the last loop from the last stitch on your hook. But amigurumi shapes benefit from a few additional techniques.
This post contains affiliate links to products I recommend to my readers. If you click on one of these links and decide you’d like to make a purchase, I will make a small commission (at no extra cost to you).
Fastening Off in Amigurumi
The traditional method of fastening off is fairly straightforward when working with a flat, two-dimensional project like a blanket or a scarf. You pull the yarn through the last stitch on your hook, leave a bit of length, and cut the yarn. Then you weave in your cut yarn end by using a yarn needle.
But what about amigurumi? Amigurumi works with three-dimensional shapes, so let’s look at two fastening off techniques that achieve a neat, clean result.
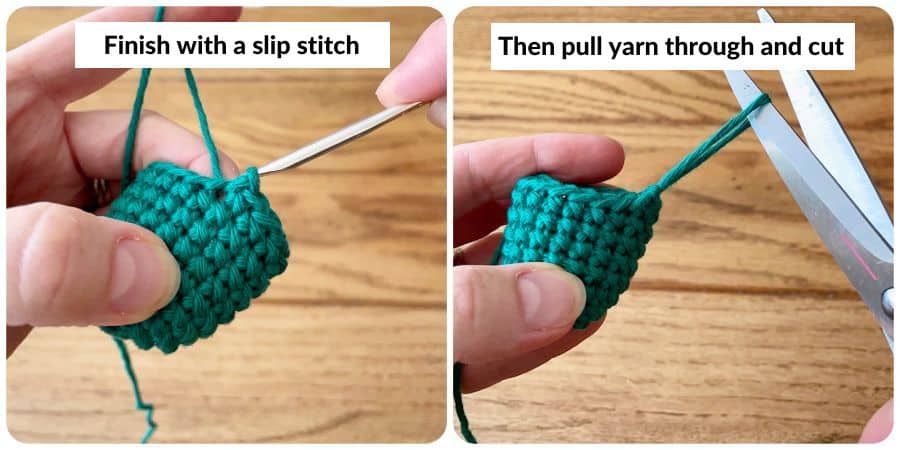
1. Fastening Off an Open Piece
Amigurumi patterns often have many open pieces – legs, arms, snouts, etc. that are worked in the round and come to an open end that will be sewn to another piece of the project. With open pieces, I recommend finishing the last round with a slip stitch, then fastening off by pulling the yarn through the last loop (leaving enough length to later sew on the piece). Using a slip stitch in this way helps make a smoother transition on the edge and looks neater.
2. Fastening Off a Closed Piece
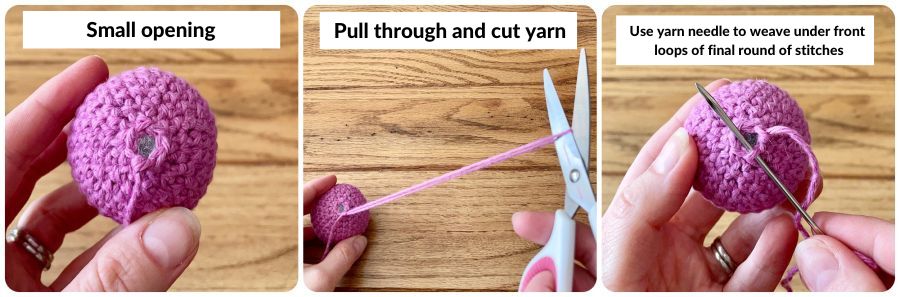
Amigurumi also has many round shapes that end with consecutive decreasing rounds, often finishing with a small round of 6 stitches. But those 6 stitches leave a little opening showing the stuffing inside. This won’t work, will it? In this case, we need to use what’s called the “drawstring method”.
First, pull the yarn through the final loop on the hook and cut the yarn, as before. Then, use a yarn needle to weave through the front loops of all six stitches from the last round, working outside to inside. I highly recommend a bent-tipped yarn needle (like this one) for this process. The bent tip makes it easier to weave the needle under small stitches.
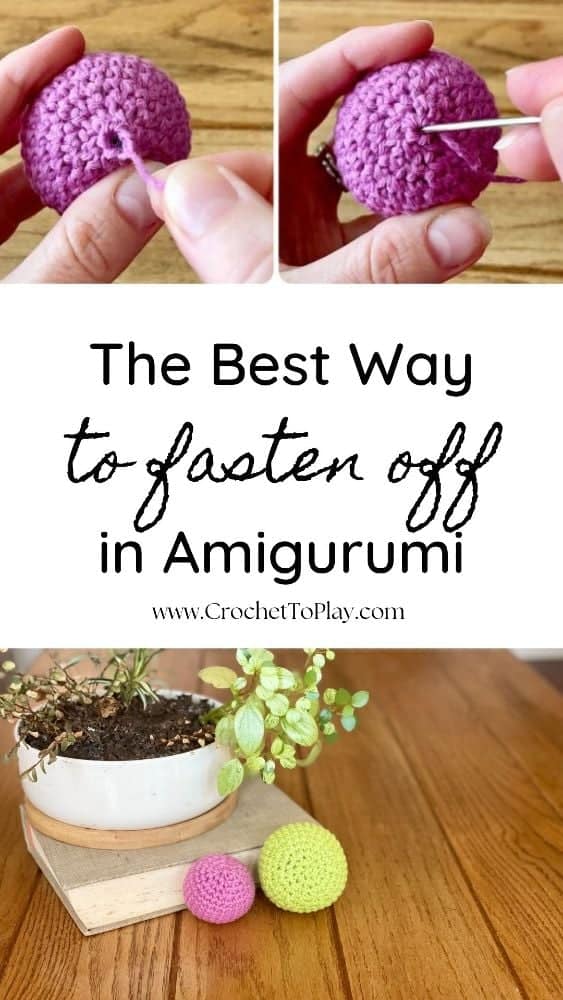
Then, pull the yarn tail to close the shape (like a drawstring). Insert your yarn needle into the center of the circle and bring it through to the other side of the shape. To secure this yarn end, I tie a knot close to the surface and use my yarn needle to bring the end back inside the piece. If you’d like to see a video of this “drawstring” process, Ollie Holly Crochet has a great one here.

Did you learn something new about how to fasten off in amigurumi? I hope it was helpful! Tips like this can take your amigurumi to the next level, so check out more resources here. Let me know in the comments if you have any questions, and happy crocheting!
Save this resource on Pinterest for when you need it!
© 2026 Crochet to Play
All rights reserved. Designed and written by Jennifer Percival. This pattern is property of Crochet to Play. The written pattern and images are for personal use only. Please do not redistribute, transfer, or sell the pattern or images, in part or in whole. Thank you.