Crochet Pine Needle Pattern
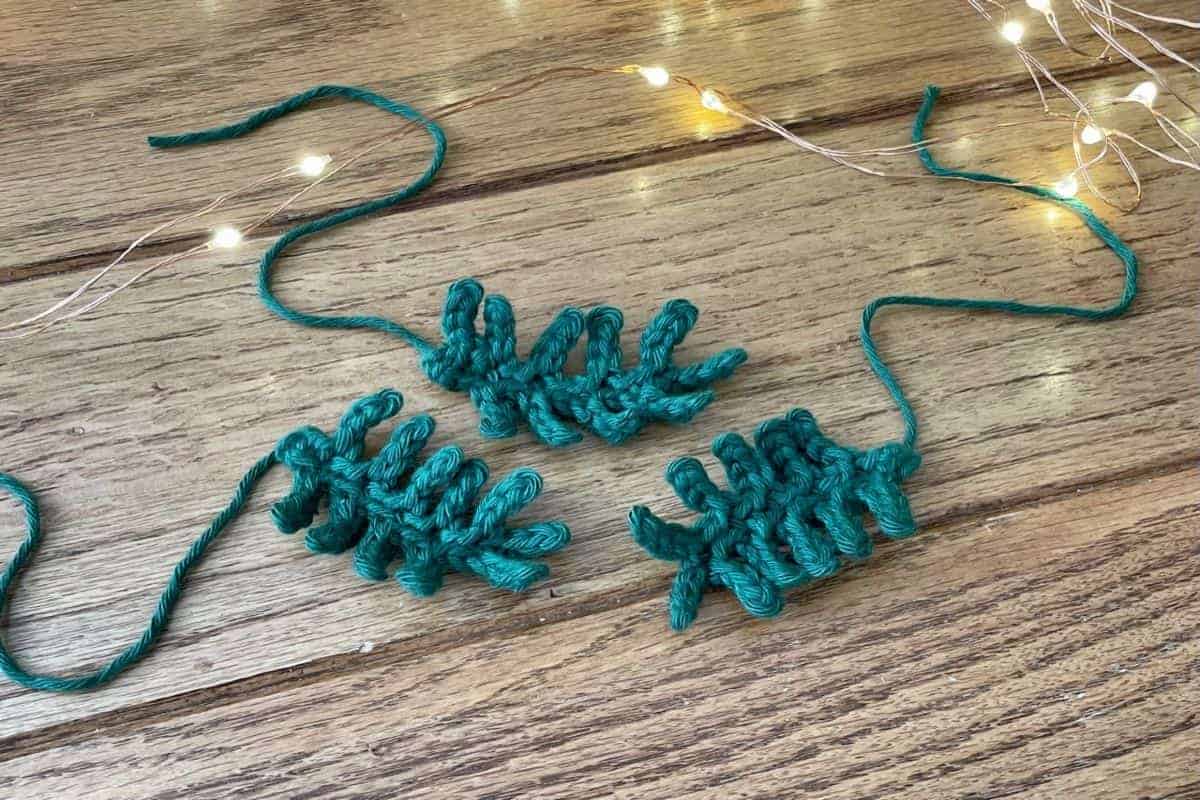
Recently I designed a pine cone pattern and even though I loved it, something was missing. What did it need? Greenery! So I came up with a quick and easy crochet pine needle pattern.
You can use this greenery any time of year, but I think it’s especially perfect for Christmas decorating. If you’re making a garland, ornaments, or an embellishment for the top of a gift, this pattern may be just what you need for your project. And the best part is, it takes very little time to work up a few stems.
The crochet pine needles are made by starting with a chain. Then, simple chains and slip stitches are used to branch off on either side of the main chain. Although it might look a little complicated, you’ll see it’s really easy once you get started.
You’ll probably notice the stems I made for this pattern are relatively short. That’s because I wanted them to match the size of the pine cones I had made. If you have a different length in mind, you can use the same basic idea in this pattern to create your desired length of greenery (more on that below).
This post contains affiliate links to products I recommend to my readers. If you click on one of these links and decide you’d like to make a purchase, I will make a small commission (at no extra cost to you).
Crochet Pine Needle Pattern
Materials Used:
- Yarn – worsted weight in preferred shade of green (yarn pictured is Knit Picks Dishie in Jalapeno)
- Size E/3.5mm crochet hook
- Yarn needle (for weaving in ends)
Stitches/Abbreviation Used:
- ch – chain
- sl st – slip stitch
- st/sts – stitch/stitches
Finished Size:
One finished pine needle “branch” is 3″/7.5cm long.
Pattern:
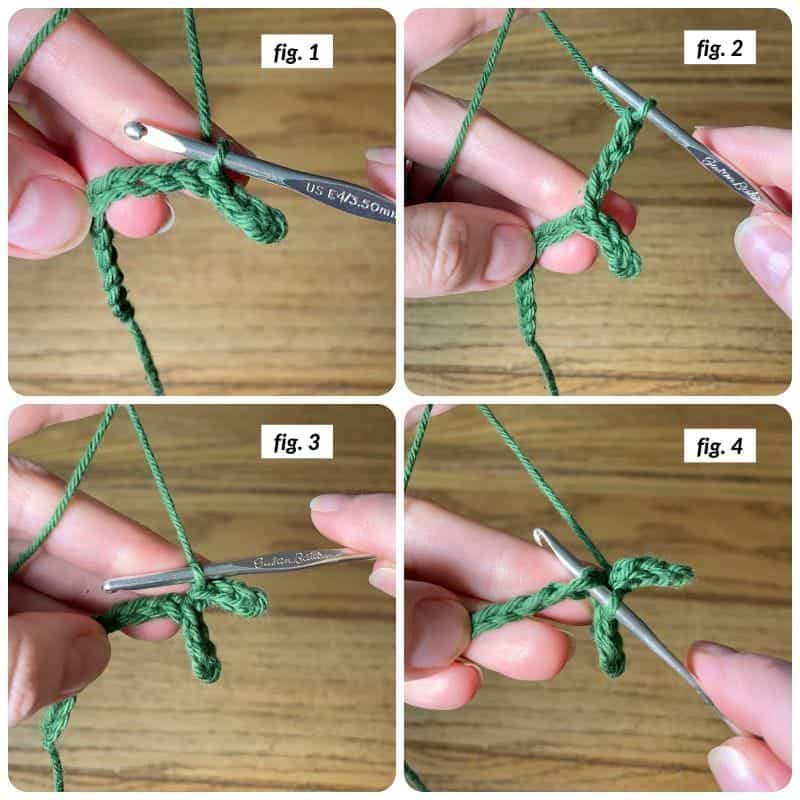
Leaving a beginning tail, ch 14. Sl st in 2nd ch from hook and in next 2 ch sts (fig. 1).
*From current loop on hook, ch 4 (fig. 2).
Sl st in 2nd ch from hook and in next 2 ch sts (fig. 3).
Attach with a sl st to the next unworked ch of original chain (fig. 4).
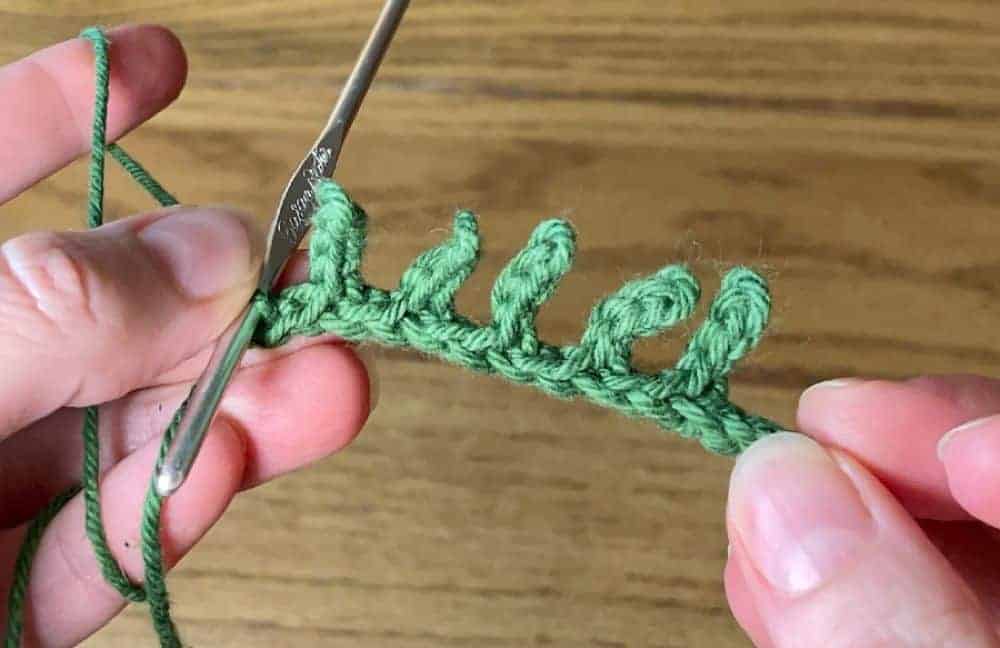
Sl st in next ch.
Repeat from * 4 more times along the original chain. This will give you one pine needle at the top of the chain and five down one side.
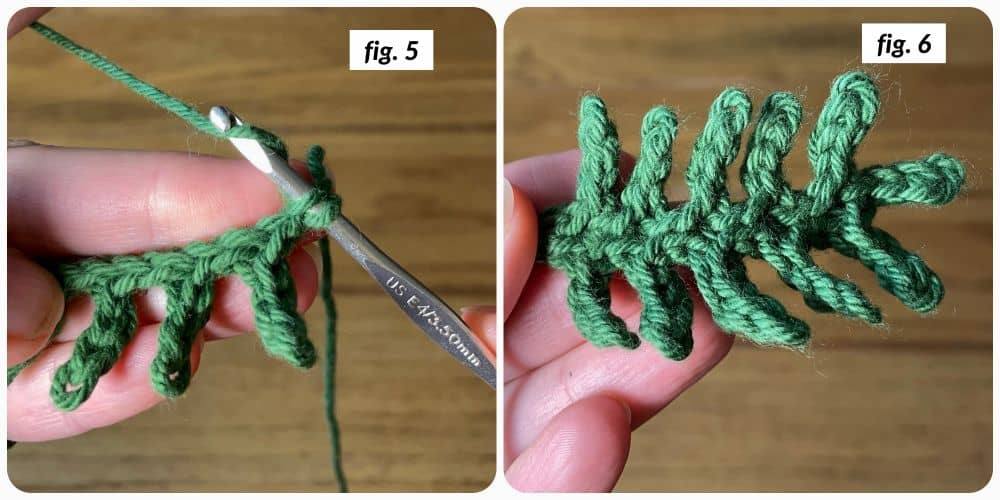
Now turn, and work up the other side of the chain. Sl st into the first chain (this is the same chain you finished working into on the first side – you’re now just working into the opposite side) (fig. 5).
Sl st again into the next st.
*From current loop on hook, ch 4. Sl st in 2nd ch from hook and in next 2 ch sts. Attach with a sl st to the next unworked ch (of original chain). Sl st in next ch. Repeat from * 4 more times along this side of the chain (fig. 6).
Finishing Up
To fasten off, first pull your yarn through your final stitch and cut, leaving a few inches. Then, use your yarn needle to weave this end back through your original chain. Once you have the number of pine needles desired, you can use their beginning tails to attach or sew where you need them.
Pretty simple, right? If you want to make the greenery longer or shorter, just adjust the initial chain to the length you want. Make sure your chain has an even number; then you can follow the same branching method used above. Using this method, you can customize the crochet pine needle pattern to any length you need.
If you like this crochet pine needle pattern, make sure to share it with your crocheting friends! And let me know in the comments how you’ll use your greenery. And you can find more free patterns from the blog here. Happy crocheting!
Save this pattern on Pinterest for later!

© 2026 Crochet to Play
All rights reserved. Designed and written by Jennifer Percival. This pattern is property of Crochet to Play. The written pattern and images are for personal use only. Please do not redistribute, transfer, or sell the pattern or images, in part or in whole. Thank you.
I hope you have a YouTube Channel. I am a visual learner. But still I am grateful for the pattern.
You know, I haven’t gotten into the world of video yet, but I hope to someday!
thank you! you’ve made a really simple and effective pattern for pine needles/small branches. I’m making a christmas garland and it called for fresh pine sprigs but i didn’t want them to dry out and thought i could crochet them instead if i only had a pattern. Thanks again!
What a great idea! I’m glad this pattern can help. 🙂